
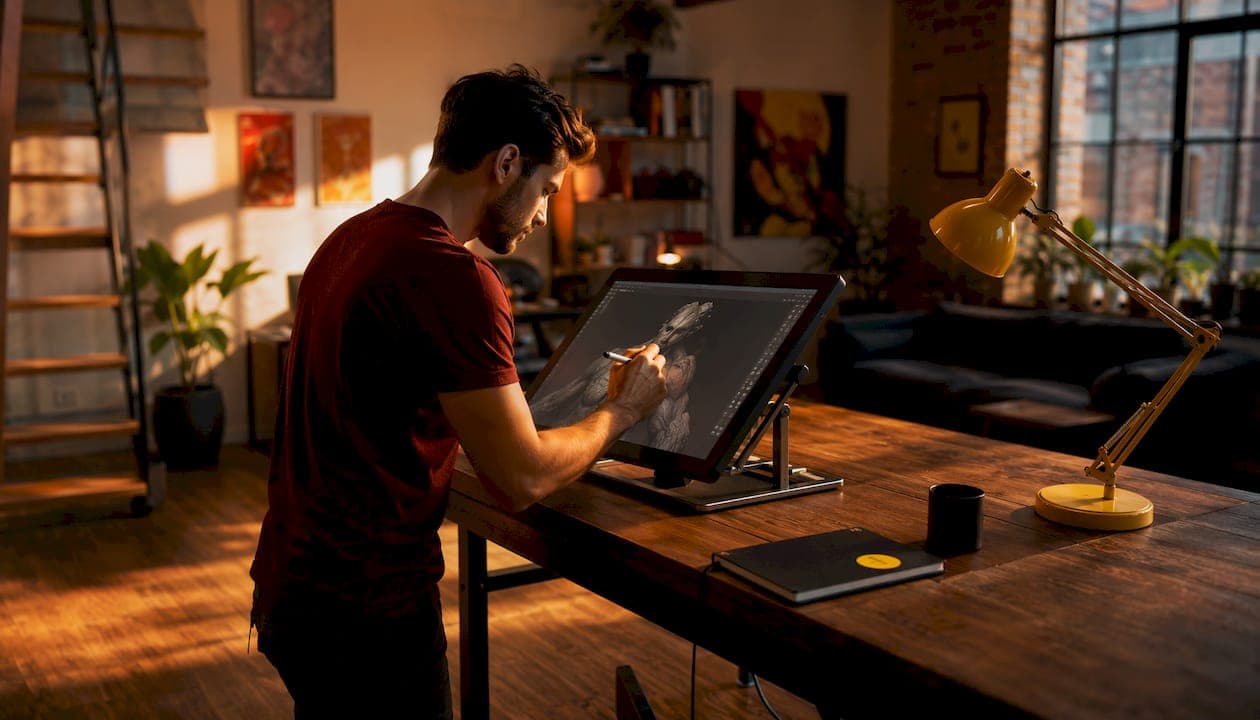
Photorealistic CGI is computer-generated imagery produced to a standard where the result is indistinguishable from a photograph. Built on ray tracing and Physically Based Rendering (PBR), it gives brands and creators complete control over lighting, materials, and camera without ever touching a physical set. Studios like 35milimetre use these techniques to produce product and advertising visuals that hold up against real photography at any resolution.
Table of Contents
- What photorealistic CGI actually means
- Core technical ingredients that make a render look photographic
- How a photorealistic CGI pipeline works from start to finish
- Where photorealistic CGI delivers the most value
- Photorealistic CGI versus traditional photography
- Photorealistic CGI versus AI image generation
- How to judge whether an image is truly photorealistic
- Practical limits: cost, time, and why renders still look digital
- How a professional post-production team approaches photorealism
- How photorealistic CGI evolved from wireframes to indistinguishable renders
- What software and hardware you need to create photorealistic CGI
- Photorealistic CGI versus stylized or non-photorealistic CGI
- Which rendering engines are used for photorealistic CGI
- When you need a professional studio versus accessible tools
- Key Takeaways
- What clients consistently underestimate about photorealistic CGI
- Get a photorealistic CGI quote from 35milimetre
- Useful sources and further reading
What photorealistic CGI actually means
CGI covers a broad range of computer-generated visuals, from cartoon animation to architectural diagrams. Photorealistic CGI is a specific quality target within that range: an image where geometry, lighting, and materials are calibrated so precisely that a viewer cannot reliably tell it from a photograph.
A practical example: a cosmetics brand launching a new serum needs 12 product shots across different backgrounds, lighting moods, and angles. Scheduling 12 studio photography sessions is expensive and slow. A photorealistic CGI pipeline produces all 12 variants from a single 3D model, with consistent branding and no reshooting. The outcome is the same shelf-ready image, built entirely in software.
"Photorealistic" is an outcome, not a tool. No single piece of software guarantees it. It requires the right combination of geometry, materials, lighting, and rendering algorithm working together.
Key qualities that separate photorealistic CGI from general CGI:
- The image passes a casual visual inspection as a photograph
- Materials respond to light the way their real-world counterparts do
- Shadows, reflections, and depth-of-field match camera optics
- Color temperature is consistent across the whole scene
Core technical ingredients that make a render look photographic
Six building blocks determine whether a render reads as photographic or digital.
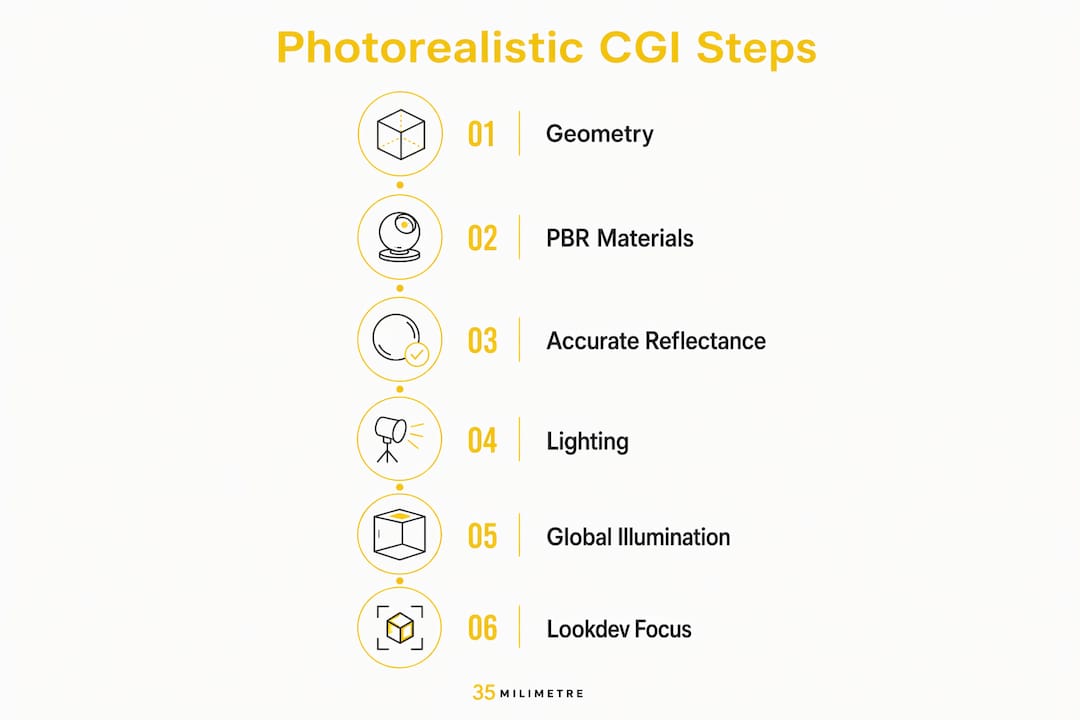
Geometry and microdetail. High-polygon models with displacement maps and surface imperfections prevent the "too perfect" look that immediately reads as CGI.
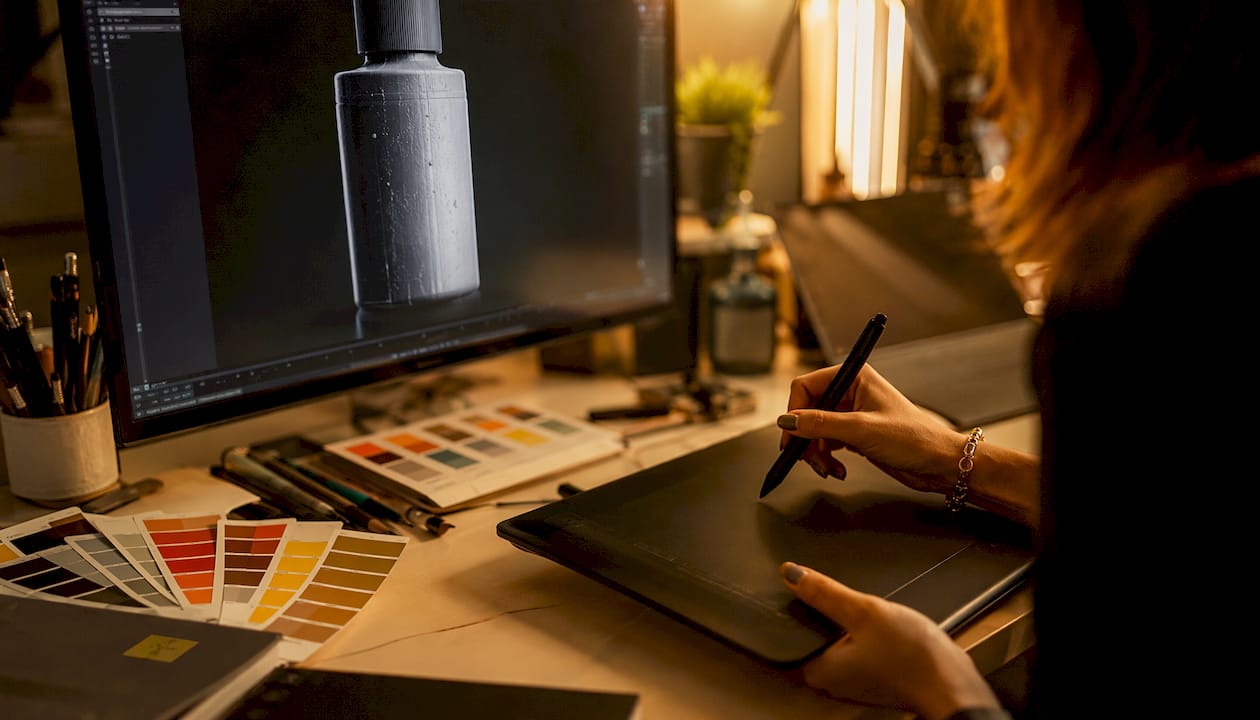
Physically Based Materials (PBR). PBR defines materials with physically meaningful parameters, microsurface roughness and metalness chief among them, so surfaces behave consistently across any lighting environment. A brushed-aluminum finish under a warm key light should look different from the same finish under overcast daylight, and PBR ensures it does.
Accurate reflectance (BRDF). The Bidirectional Reflectance Distribution Function describes how light scatters off a surface. Incorrect BRDF values are one of the fastest ways to break photorealism, especially on glossy plastics and coated metals.
Lighting and HDRI environments. Real-world High Dynamic Range Image (HDRI) captures encode the full luminance range of a physical environment. Matching the HDRI to the product's intended context grounds the render in a believable world.
Global illumination and ray tracing. Ray tracing follows light paths recursively, capturing indirect specular reflection and transmission. That bounced light filling the shadow side of a product is what separates a photorealistic render from a flat, studio-lit fake.
Camera optics. Depth-of-field, lens distortion, chromatic aberration, and accurate focal length all contribute. A render shot at 85mm with a shallow f/2.8 depth-of-field reads very differently from the same scene at 35mm, and that difference matters for product photography.
| Technical term | Plain meaning | Why it matters |
|---|---|---|
| PBR | Material system using physical parameters | Consistent look across lighting setups |
| BRDF | How a surface scatters incoming light | Controls gloss, matte, and metallic response |
| Ray tracing | Simulates actual light paths through a scene | Produces accurate reflections, shadows, and indirect light |
| Global illumination (GI) | Indirect light bouncing between surfaces | Fills shadows naturally; prevents "floating" objects |
| HDRI | High-dynamic-range environment image | Provides realistic ambient light and reflections |
| AOV / render pass | Separate image layer per lighting component | Allows compositing fixes without full re-renders |
The single biggest perceptual return in any photorealistic render comes from material calibration under indirect light. Getting the roughness value of a surface wrong by a small margin reads as obviously digital the moment ambient light wraps around it. Geometry and texture resolution matter, but material finish under real-world lighting conditions is where photorealism is won or lost.
Pro Tip: Invest the most lookdev time in the materials that will catch the most light: hero surfaces, reflective packaging, and any glass or liquid element. These are the first things a viewer's eye tests for plausibility.
How a photorealistic CGI pipeline works from start to finish
A professional render follows a defined sequence. Each phase feeds the next, and skipping steps compounds errors downstream.
- Concept and reference gathering. Collect physical reference photos, material swatches, and approved brand guidelines. The more specific the reference, the fewer revision rounds later.
- 3D modeling. Build geometry to the required polygon density. Hero product shots need subdivision-ready models; background props can be lower resolution.
- UV unwrapping and texturing. Lay out UV maps so texture maps project without distortion. Apply albedo, roughness, metalness, normal, and ambient occlusion maps.
- Shading and lookdev (PBR setup). Assign physically based shading parameters. This is where material calibration happens, and it is the most time-intensive phase for complex surfaces.
- Lighting and HDRI matching. Place key, fill, and rim lights. Match the HDRI environment to the intended context. Test for consistent color temperature across the scene.
- Test renders and render passes. Run low-sample test renders to check composition and material response before committing to full render times.
- Final rendering with AOVs. Render the full image plus separate Arbitrary Output Variable (AOV) passes: diffuse, specular, roughness, normal, ambient occlusion, and Z-depth. These passes give compositors surgical control in post.
- Compositing and color grading. Layer AOV passes in software like Nuke or Adobe After Effects. Adjust color temperature, add lens effects, and integrate with any photographic background elements.
- Delivery. Export to required formats and sizes. For e-commerce, this typically means layered files plus flattened web-ready versions.
| Pipeline phase | Primary cost driver | Typical revision risk |
|---|---|---|
| Modeling | Polygon complexity, product detail | Low if references are thorough |
| Lookdev / shading | Number of unique materials | High without physical reference samples |
| Lighting | Number of setups / environments | Medium |
| Rendering | Ray-trace sample count, scene complexity | Low once approved |
| Compositing | Number of AOV passes, background integration | Medium |
When a photographic background is required, studios often use a hybrid photo-plus-CGI workflow, placing a rendered product into a real photograph. This approach cuts environment-build time while preserving the photorealistic product render.
Where photorealistic CGI delivers the most value
Photorealistic CGI is the right tool when physical access, iteration speed, or creative control would be impossible or prohibitively expensive with traditional photography.
- Product visualization for e-commerce. Render a product before it ships from the factory. Brands can populate listings, run paid ads, and brief retailers weeks ahead of physical stock.
- Automotive visuals. Car manufacturers use CGI to produce hero shots of colorways and trim levels that do not yet exist as physical vehicles. See how this plays out in automotive CGI campaigns built for major brands.
- Architectural exteriors and interiors. Developers sell units from renders before construction begins. For interior design, CGI lets clients approve finishes and furniture layouts without physical staging. CGI for interior designers is now a standard pre-sale tool.
- Film VFX. Environments, creatures, and destruction sequences that cannot be filmed practically are built and rendered in CGI, then composited with live-action plates.
- Advertising hero shots. A single 3D model can generate dozens of campaign variants, different angles, backgrounds, and lighting moods, without reshooting.
- AR/VR prototyping. Photorealistic assets built for still renders can be repurposed for augmented reality product previews, giving customers a try-before-you-buy experience.
Photorealistic CGI versus traditional photography
Both produce images that sell products. The decision between them comes down to scale, control, and access.
| Factor | Photorealistic CGI | Traditional photography |
|---|---|---|
| Creative control | Full: lighting, camera, environment adjustable at any stage | Limited by physical set, product, and conditions |
| Iteration speed | Fast once the model exists; variants are render settings | Reshooting required for each significant change |
| Physical product needed | No; renders can precede manufacturing | Yes |
| Absolute physical fidelity | Very high with calibrated PBR; some edge cases remain | Captures real-world light behavior exactly |
| Cost at scale | Lower per variant as model amortizes | Scales linearly with shoot days |
| Turnaround | Days to weeks depending on complexity | Days, but dependent on scheduling |
When to choose photography: when the product's tactile or material qualities are genuinely difficult to calibrate in CGI (certain fabrics, handmade ceramics), when the shoot is a one-off hero image with no variants, or when the timeline is too short for modeling.
When to choose CGI: when you need multiple variants, when the product does not yet exist physically, when the environment needs to be controlled or fantastical, or when the image library will be reused across campaigns.
Hybrid approaches, where a CGI product is composited into a real photograph, often give the best of both: a controlled, consistent product render in a believable, photographic environment.
Photorealistic CGI versus AI image generation
These are fundamentally different pipelines, not competing versions of the same tool.
CGI builds a 3D scene under direct artist control and renders it through a physics-based algorithm. Every element is inspectable, adjustable, and repeatable. AI image generation predicts pixels from patterns learned during training, guided by a text or image prompt. The output is probabilistic: similar prompts produce similar but not identical results.
Key practical differences:
- Control. CGI gives exact geometry, camera position, and material specification. AI gives approximate aesthetics with limited geometric precision.
- Reproducibility. A CGI render of a product is consistent across every frame and variant. AI outputs vary between generations, which creates problems for brand consistency.
- Asset ownership. CGI produces a 3D asset your team owns and can reuse indefinitely. AI generates a flat image with no underlying geometry.
- Legal clarity. CGI assets are created from scratch or licensed source geometry. AI training data provenance remains an active legal discussion in the United States.
Is CGI more realistic than AI? For product and brand work, CGI is more consistent and controllable. A well-executed CGI render is indistinguishable from photography. AI can produce impressive single images but struggles to maintain exact product geometry, color accuracy, and brand fidelity across a set. For creative exploration and mood-boarding, AI tools like Midjourney are fast and useful. For final campaign assets, CGI remains the reliable standard. For a deeper look at how AI fits into the broader image-creation workflow, see AI imagery for marketers.
How to judge whether an image is truly photorealistic
Human perception judges photorealism by testing a set of visual cues simultaneously. A single mismatch can break the illusion even when everything else is correct. Use this checklist when evaluating renders:
- Shadow softness and falloff. Hard shadows with no penumbra read as digital. Real shadows soften with distance from the casting edge.
- Consistent color temperature. Every light source in the scene should share a plausible color temperature. Mixed warm and cool sources without a logical reason signal a compositing error.
- Believable indirect light. Bounced light should fill shadow areas with a tint from nearby surfaces. Flat, unlit shadows are the most common giveaway.
- Accurate reflections and specularity. Reflections should show the correct environment, not a generic HDRI that does not match the scene.
- Depth-of-field and lens artifacts. A shallow focus plane, slight chromatic aberration, and natural bokeh all signal a real camera. Perfectly sharp renders at every depth look synthetic.
- Microdetail in textures. Fingerprints, surface scratches, and material grain at close range. Perfectly clean surfaces do not exist in the physical world.
- Plausible material response across lighting. A glossy surface should behave differently under a point light versus diffuse overcast. If it looks the same in both, the BRDF is wrong.
- Ambient occlusion in contact areas. Where surfaces meet or nearly touch, light occludes. Missing contact shadows make objects appear to float.
Score the image out of 8. A score of 6 or above suggests strong photorealism for most commercial applications. A score of 8 means the image will pass a casual viewer test without question.
When commissioning work, ask for a test render of the most challenging material in the scene before approving the full production render. That single test will reveal more about a studio's capability than any portfolio image.
Practical limits: cost, time, and why renders still look digital
Photorealistic CGI is not instant or cheap at the high end. Understanding where time and budget go helps you plan a realistic brief.
- Modeling complexity drives the largest upfront cost. A simple packaged good takes less time than a mechanical product with dozens of moving parts.
- Lookdev and material calibration is the most skilled phase. Incorrect microsurface roughness or ambient light leaks are the most common reasons a render looks digital, even when geometry and textures are high quality.
- Ray-traced rendering is computationally expensive. A single high-sample frame for a hero shot can take hours on a workstation. Studios manage this with render farms or cloud rendering.
- Compositing adds time when multiple AOV passes need to be balanced and integrated with photographic backgrounds.
Common reasons a render still looks digital: incorrect roughness values on key surfaces, missing or weak ambient occlusion, low sample counts producing visible noise, mismatched color temperature between the HDRI and the scene lights, and overly clean geometry with no surface imperfection. Fixing any one of these often produces a noticeable jump in perceived realism. For a detailed look at managing these trade-offs in a real production context, the 3D product rendering workflow guide covers the full pipeline with practical constraints.
How a professional post-production team approaches photorealism
A studio brief that arrives with thorough reference material produces better results faster. Before starting any photorealistic CGI project, a professional team needs:
- Physical reference photos of the product from multiple angles, including close-ups of key material surfaces
- Approved camera angles and focal lengths, or reference shots showing the desired perspective
- Lighting mood references: real photographs that capture the intended atmosphere
- A list of required variants (colorways, backgrounds, angles, sizes)
- Delivery specifications: file formats, resolution, color profile
Pro Tip: Provide a physical sample or high-resolution material swatch for any surface that is critical to the brand. Calibrating a material from a photograph alone introduces guesswork that costs revision rounds.
Production teams at studios like 35milimetre use standardized PBR material libraries and consistent HDRI capture practices to reduce per-scene tuning. AOV-based compositing workflows mean that subtle realism adjustments, tweaking the specular pass or tightening ambient occlusion, happen in post rather than requiring a full re-render. Small teams scale by bringing in specialist texture artists or lookdev artists for complex materials, keeping the core pipeline tight while adding capacity where the brief demands it.
[*[author_bio] [brand_signal] ]
How photorealistic CGI evolved from wireframes to indistinguishable renders
The history of photorealistic CGI is essentially the history of computational power catching up with the physics of light. Turner Whitted's 1980 paper introduced recursive ray tracing, which made accurate reflections and refractions possible for the first time. Through the 1980s and 1990s, studios like Pixar advanced rendering research, though their work was stylized rather than photorealistic. The shift toward photorealism accelerated in the 2000s as global illumination algorithms became practical for production use.
By the 2010s, physically based rendering had become the industry standard. PBR unified material authoring across different renderers, meaning an asset built in one pipeline could be transferred to another without complete rework. GPU rendering, led by engines like Redshift and Octane, cut render times from hours to minutes for complex scenes. Today, real-time engines like Unreal Engine 5 can produce near-photorealistic results at interactive frame rates, a capability that was considered impossible a decade ago.
What software and hardware you need to create photorealistic CGI
The software stack for photorealistic CGI has consolidated around a small set of industry-standard tools. On the modeling side, Autodesk Maya and Blender handle the majority of production work. Blender, in particular, has become a serious production tool with its Cycles renderer delivering high-quality ray-traced results at no cost.
For rendering, the dominant engines are Arnold (used heavily in film and advertising), V-Ray (the standard in architecture and product visualization), and Redshift (favored for GPU-accelerated production work). Unreal Engine 5's Lumen global illumination system has made real-time photorealism viable for interactive and broadcast applications. Compositing typically happens in Nuke for film-level work or Adobe After Effects for advertising and product work.
Hardware requirements scale with ambition. A capable workstation for photorealistic CGI needs a modern multi-core CPU (AMD Threadripper or Intel Core i9 class), a professional GPU with at least 16GB of VRAM for GPU rendering, 64GB or more of system RAM, and fast NVMe storage for large texture libraries. Studios running heavy ray-traced renders use cloud rendering services like AWS Thinkbox Deadline or Chaos Cloud to supplement local hardware without capital investment.
Photorealistic CGI versus stylized or non-photorealistic CGI
The difference between photorealistic and non-photorealistic CGI is a difference in intent, not just appearance. Non-photorealistic rendering (NPR) deliberately departs from physical accuracy to achieve a stylized look: cel shading for cartoon aesthetics, toon shaders for graphic novel styles, or painterly effects for artistic applications. Video games like The Legend of Zelda: Breath of the Wild use NPR to create a distinctive visual identity that would be undermined by photorealism.
Photorealistic CGI, by contrast, treats physical accuracy as the goal. Every rendering decision, from material roughness to shadow falloff, is made in service of matching real-world light behavior. The two approaches use much of the same underlying technology but apply it toward opposite ends. For brand and product work, photorealism builds trust because it sets accurate expectations about how a product looks in the real world. Stylized CGI serves brand identity and storytelling goals where a distinctive aesthetic matters more than physical accuracy.
Which rendering engines are used for photorealistic CGI
The rendering engine is the software that converts a 3D scene into a final image. Each major engine has a distinct strength profile.
Arnold is the production standard for film and high-end advertising. It is a CPU-based, unbiased path tracer known for accurate, predictable results and deep integration with Maya and Houdini. The trade-off is render time: Arnold is slower than GPU renderers on equivalent hardware.
V-Ray dominates architecture and product visualization. It offers both CPU and GPU rendering modes, a mature material library, and tight integration with 3ds Max, SketchUp, and Rhino. Its hybrid rendering mode lets studios balance speed and quality.
Unreal Engine 5 with Lumen and Nanite delivers real-time photorealism for interactive applications, virtual production, and broadcast. It is not a traditional offline renderer, but for clients who need interactive walkthroughs or virtual production workflows, it has changed what is possible at speed.
Blender Cycles is the accessible entry point. It is free, open-source, and capable of production-quality ray-traced renders. For small teams and independent creators, Cycles removes the licensing cost barrier without sacrificing render quality.
Redshift is the GPU-accelerated choice for studios that need fast turnaround on complex scenes. It is biased, meaning it uses approximations to speed rendering, but at high settings the results are competitive with unbiased renderers.
When you need a professional studio versus accessible tools
Accessible tools like Blender Cycles and consumer-grade render engines have genuinely lowered the barrier to photorealistic CGI. A skilled individual can produce strong product renders without a studio budget. The question is where the complexity, stakes, and scale of the project exceed what a solo operator can reliably deliver.
A professional studio makes sense when the project requires multiple complex materials calibrated to brand standards, when the image will appear in high-visibility advertising where a single off-note in the render will be noticed, when tight turnaround requires parallel workflows across modeling, lookdev, and compositing, or when the client needs a consistent visual library across dozens of variants. Studios also carry the infrastructure: render farms, licensed software, and the institutional knowledge to anticipate problems before they cost revision rounds.
For internal prototyping, mood-boarding, or low-stakes product imagery, accessible tools are a reasonable starting point. For campaign-level photorealistic CGI where brand trust is on the line, the investment in a specialist team pays for itself in consistency and speed. The CGI workflows guide covers how professional pipelines are structured for exactly these situations.
Key Takeaways
Photorealistic CGI is an outcome defined by physical accuracy in materials, lighting, and rendering, producing images that pass as photographs under casual inspection.
| Point | Details |
|---|---|
| Photorealism is an outcome, not a tool | It requires geometry, PBR materials, accurate lighting, and ray tracing working together. |
| Material calibration is the critical factor | Incorrect roughness values and missing indirect light are the most common reasons renders look digital. |
| CGI vs. photography decision | Choose CGI for multiple variants, pre-production assets, or controlled environments; choose photography for unique tactile materials or single hero shots. |
| CGI vs. AI generation | CGI offers consistent, controllable, brand-accurate outputs; AI generation is fast but probabilistic and lacks geometric precision. |
| 35milimetre for campaign-level work | 35milimetre delivers photorealistic CGI and compositing for brands and agencies where consistency and quality are non-negotiable. |
What clients consistently underestimate about photorealistic CGI
The gap between a render that looks "pretty good" and one that genuinely passes as a photograph is almost always in the materials, not the geometry. Clients tend to focus on whether the model looks right in shape and proportion, which is the easier half of the problem. What actually breaks photorealism is a roughness value that is slightly too uniform, a specular highlight that does not shift correctly as the camera angle changes, or an ambient occlusion pass that is too strong or too weak for the scene's lighting.
The other consistent surprise is how much a single targeted fix can change the perception of an entire image. Correcting the indirect light behavior on one hero surface, or tightening the contact shadow where a product meets a surface, can take a render from "clearly digital" to "I'd believe that's a photograph" in one revision. That is the part of the process that is hard to communicate in a brief but easy to see in a side-by-side comparison. When a brand is deciding between a studio photo shoot and CGI for a product launch, the real question is not which looks more real. It is which gives you more control over the final image across every channel you need to fill.
Get a photorealistic CGI quote from 35milimetre
If you are evaluating photorealistic CGI for a product launch, campaign, or visual library, 35milimetre works directly with brands, ad agencies, and photographers to deliver renders that hold up at any size and in any context.
To get an accurate quote, the most useful information to share is: reference photos of the product and key materials, the camera angles and lighting mood you have in mind, the number of variants you need (colorways, backgrounds, sizes), your delivery format requirements, and your timeline. The more specific the brief, the faster the estimate and the fewer surprises during production. Contact 35milimetre to share your brief and get a clear scope from a team that has delivered photorealistic visuals for major technology and automotive brands.
Useful sources and further reading
- Physically Based Rendering: From Theory to Implementation — the authoritative technical reference for ray tracing and photorealistic rendering algorithms
- Photoreal rendering glossary, Miris — concise definitions of PBR, BRDF, and perceptual realism criteria
- CGI definition, TechTarget — broad overview of CGI applications across industries
- Computer-generated imagery, Wikipedia — historical context and technical overview
- CGI vs. AI image generation — practical comparison of pipeline differences and use cases
- What is CGI visualization? A complete guide — 35milimetre's overview of visualization methods and applications
- Professional image manipulation guide — compositing and post-production techniques for visual creatives