
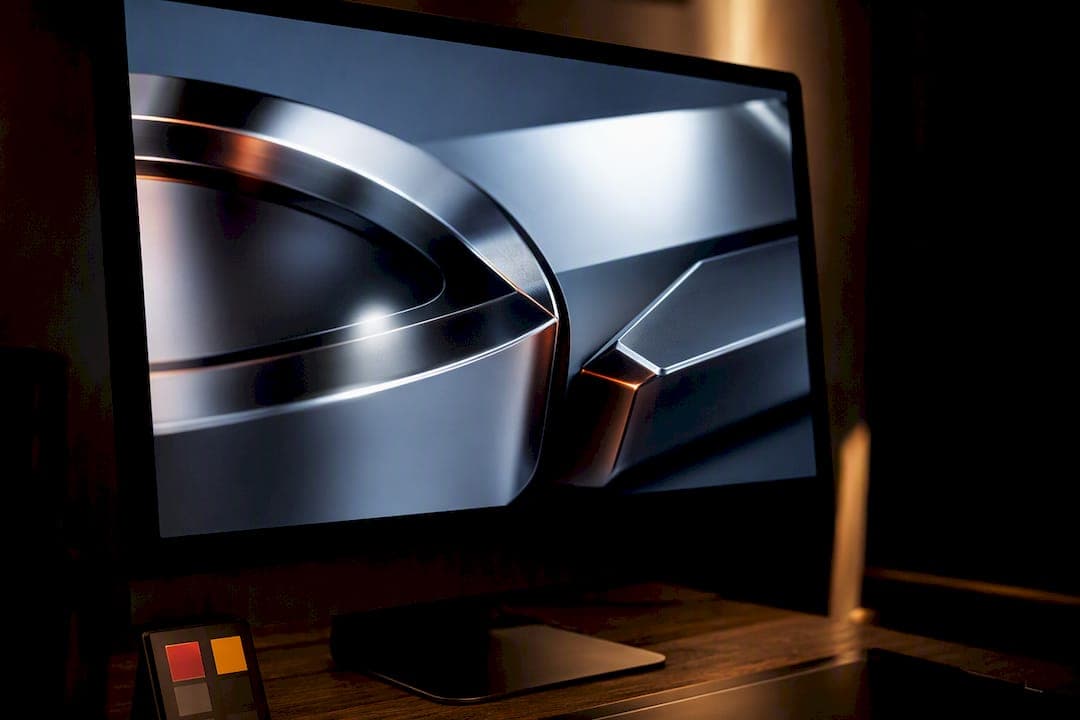
Believable metal product renders come down to six moves: set reflectivity and edge tint from physical data, dial in roughness, add anisotropy for brushed finishes, light with a controlled studio HDRI, cut micro-bevels into every edge, and layer scratch and micro-roughness maps before pulling AOVs into composite. Skip any one of these and metal reads as plastic with a gray tint. We break down each lever below, the way we would brief a junior artist on a commercial job.
TL;DR:
- Set reflectivity and edge tint from real data or references, as they are crucial for authentic metal appearance.
- Use anisotropic shaders with proper direction locking to accurately render brushed metal textures and grain.
- Light metals with studio HDRIs, adjusting contrast and using reflectors to match the finish and avoid flat reflections.
- Model micro-bevels in geometry on close-up edges and layer scratch maps during texturing to enhance realism efficiently.
- Focus on physical parameters and geometry first, then add detailed textures and coatings as final polish steps.
Table of Contents
- What Makes Metal Product Renders Look Real?
- How Do You Render Brushed Metal With Anisotropy?
- How Should You Light Metal for Reflections?
- Why Do Bevels and Micro-Geometry Matter?
- Which Texture Maps Do Metal Renders Actually Need?
- What Render Settings Keep Metal Physically Accurate?
- What Is a Studio-Ready Workflow for Metal Product Renders?
- How Does a Studio Approach Metal Product Renders?
- The Overrated Step and the One Nobody Skips
- How 35milimetre Can Help With Metal Product Renders
- Sources
- FAQ
What Makes Metal Product Renders Look Real?
Metal is not a color, it's a behavior. Where a plastic or ceramic surface scatters light diffusely, metal reflects almost all incoming light and tints that reflection based on wavelength. Get that physical relationship wrong and no amount of texture work saves the shot.
Three parameters do most of the work. Reflectivity at normal incidence sets how much light bounces straight back at the camera when a surface faces it directly. Edge tint governs the color shift you see at grazing angles, the effect that makes copper look copper instead of orange plastic. 3Delight's metal documentation frames these as the actual physical inputs professional shaders use to reproduce aluminum, stainless steel, or brass, rather than picking an arbitrary base color and hoping.
Roughness is the third lever, and it controls highlight spread. Low roughness gives a tight, mirror-like hotspot; higher roughness smears that same light into a broad, soft gradient across the microfacets.
Pro Tip: Pull reflectivity and edge tint values from a manufacturer datasheet or a photographed sample whenever the client can provide one. Built-in renderer presets get you close, but professionals still tune these two values against real references before final approval.
Coatings add a second layer of complexity:
- Clearcoat sits on top of the base metal and adds a secondary specular layer, common on painted or lacquered hardware.
- Tempering and thin-film interference produce angle-dependent iridescent color, the blue-purple sheen you see on heat-treated steel or anodized titanium, and require a shader that simulates wavelength interference rather than a simple color tweak.
- Layered material models in renderers like CADRays let you stack these effects without hand-building the math from scratch.
How Do You Render Brushed Metal With Anisotropy?
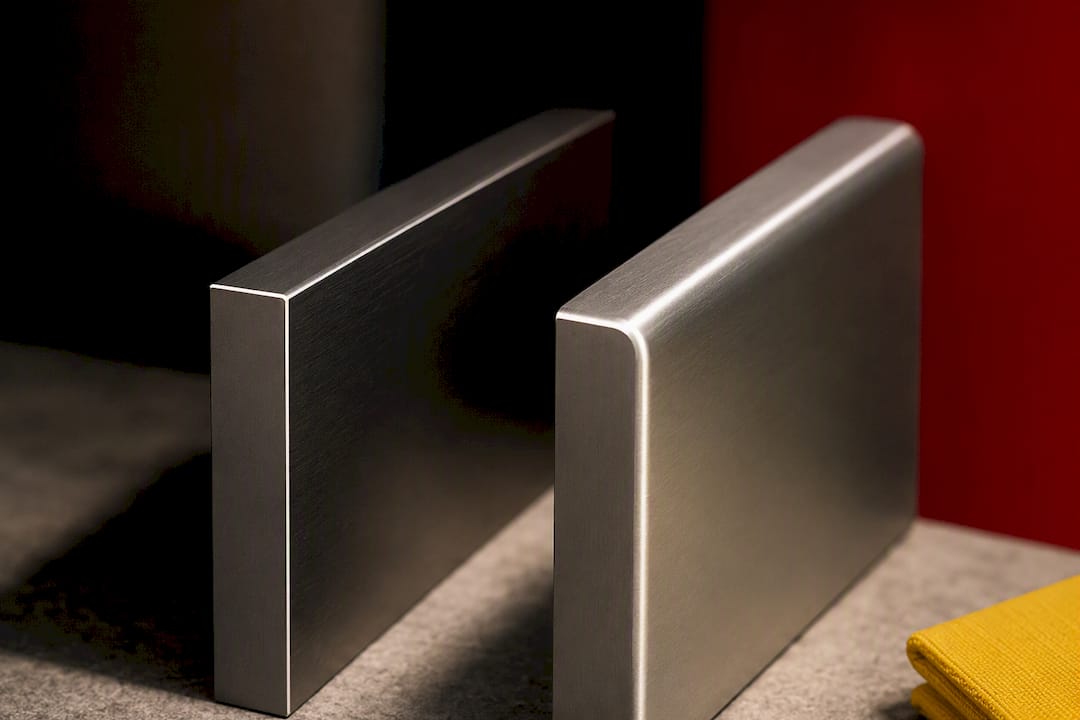
Brushed aluminum, satin steel appliances, machined watch cases: these all share a directional grain that a standard isotropic shader cannot fake. The highlight needs to stretch along the brush direction instead of forming a round hotspot, and that requires an anisotropic shader.
Anisotropic shaders compute a tangent and binormal direction across the surface, then apply separate roughness values along each axis. Implementations built for brushed-metal effects calculate a tangent direction and use distinct AlphaX and AlphaY roughness parameters, one controlling spread along the grain and one across it. In practice, that means:
- Set anisotropy amount to control how elongated the highlight becomes.
- Set anisotropy rotation to match the physical brush direction on the object.
- Layer a fine directional noise or scratch map for the visible grain texture itself, following the node-based approach Arnold's tutorials demonstrate with noise-driven bump maps and radial ramps for ringed grain.
- Reserve real geometry for grain you'll see in extreme close-up; normal maps handle everything else at a fraction of the render cost.
Pro Tip: Anisotropy direction is tied to UV space, so any object rotation, mirroring, or UV re-projection late in the pipeline can flip the grain the wrong way. Lock your tangent basis before final texturing, not after.
How Should You Light Metal for Reflections?
Metal renders as its environment. There's no diffuse fallback to hide behind, so your HDRI or light rig is doing as much work as the shader itself.
- Start with a studio HDRI for clean, commercial packshots, then edit its contrast and exposure to match the finish. A brushed satin surface wants a softer, lower-contrast environment; a polished chrome part wants sharp, high-contrast gradients that read as crisp reflection lines.
- Build custom softbox rigs when the brief calls for a specific product photography look rather than a generic studio bounce, mimicking the same key/fill/rim setup a photographer would use on set.
- Add reflector cards and negative fill to shape contrast where a raw HDRI leaves flat or blown-out zones, and use cross-polarization logic (borrowed from real studio photography) to knock down unwanted glare on curved surfaces.
- Blur the environment map slightly on rougher finishes. A sharp, high-frequency HDRI reflected off a low-roughness surface looks glassy and wrong; softening the map's detail reads as higher perceived roughness even before you touch the shader.
Modern browser-based path tracers, like Rendre, make this iteration loop fast enough to test three or four HDRI variants before committing to a final light rig.
Why Do Bevels and Micro-Geometry Matter?
A mathematically perfect 90 degree edge is invisible to light. Real machined or cast metal parts always carry a small radius, and that radius is what catches a grazing highlight and gives an edge its sense of depth.
- Cut visible micro-bevels into every hard edge in your model, sized to what the material and manufacturing process would realistically produce, since studio lighting needs that radius to graze corners and generate the highlight that reads as depth rather than a flat CAD outline.
- Model macro bevels directly in geometry where the camera will get close; bake finer micro-surface detail into normal and roughness maps to keep render cost sane on production deadlines.
- Keep topology clean and consistent across mirrored or symmetrical parts. Inconsistent normal direction between mirrored halves shows up instantly as mismatched highlights under studio lighting.
Which Texture Maps Do Metal Renders Actually Need?
A metal shader is only as convincing as the maps feeding it. For most product work, you need five: a metalness mask marking which zones are bare metal, a roughness map, an anisotropy mask for directional grain zones, a normal map for surface micro-detail, and a curvature or ambient occlusion pass to drive wear and edge highlighting.
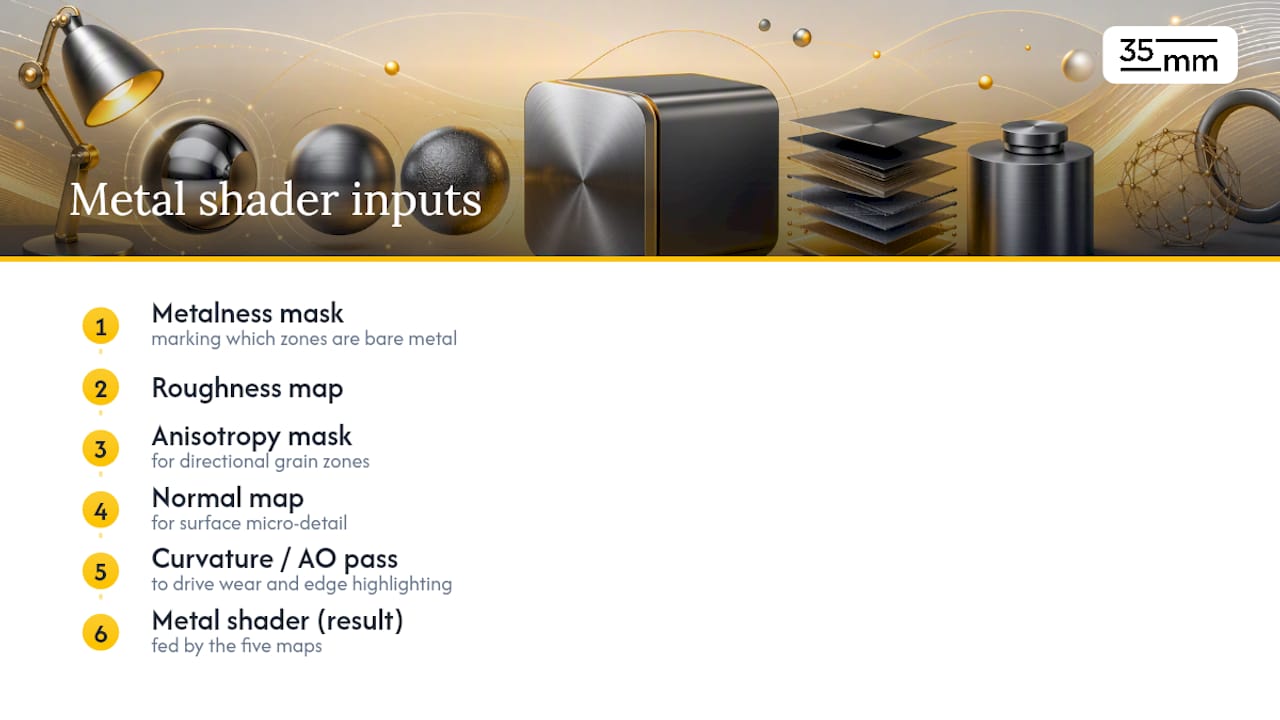
Scratch maps deserve their own layer rather than being baked permanently into roughness. Build them as a separate grayscale layer, then blend at low opacity with a masked strength control, so the art director can dial wear up for an "authentic tool" look or down to near-zero for the pristine hero shot an e-commerce listing usually needs.
Pro Tip: Keep your scratch and micro-roughness maps in a separate layer group with an opacity slider exposed to the render supervisor. Clients almost always ask for "less worn" on the second review round, and you don't want to be repainting a baked texture at 4:00 PM the day before delivery.
Export at a resolution matched to the closest expected camera distance, usually 4K for hero product shots, with tiling textures kept seamless at the UV seams and delivered as EXR or 16 bit TIFF to preserve the dynamic range metal reflections need.
What Render Settings Keep Metal Physically Accurate?
Glossy metal is one of the more expensive material types to resolve cleanly, because tight specular highlights need more samples to avoid fireflies than a diffuse surface does.
- Raise samples on the material itself before reaching for the denoiser, especially on low-roughness metals where noise shows up as visible speckling in the highlight.
- Let the denoiser handle diffuse and shadow noise, but check glossy reflections at 100% zoom before trusting it. Aggressive denoising can smear a crisp anisotropic highlight into mush.
- Pull specular/reflection, roughness, curvature, and normal AOVs separately, so compositing can push contrast or clarity on the metal highlight without touching the rest of the frame.
A path-traced renderer with physically accurate light transport, the kind modern GPU renderers now offer in near real time, keeps these passes coherent instead of fighting the compositor to fake what the render should have produced. In color-managed workflows, keep grading subtle: a hue shift of even a few degrees on a reflection pass reads instantly as "not really metal" to anyone who has looked at brushed steel under daylight.
What Is a Studio-Ready Workflow for Metal Product Renders?
A repeatable checklist keeps quality consistent across a busy production slate. Here's the order we follow on most commercial jobs:
- Import and cleanup: verify scale against real-world units, apply all pending transforms, and close any topology gaps from the CAD export.
- UVs and bakes: prioritize UV density on camera-facing surfaces, then bake curvature and ambient occlusion for wear masking.
- Material setup: set reflectivity and edge tint from reference, assign roughness, add anisotropy masks where the finish is brushed, and layer any coatings.
- Lighting: choose or edit an HDRI, add reflector cards, and render quick low-sample AOV tests before committing to final resolution.
- Render and composite: pick sample counts based on the glossiest material in frame, export the full AOV stack, and grade lightly to preserve the physical cues you built in.
| Stage | Primary goal | Common mistake to avoid |
|---|---|---|
| Import and cleanup | Accurate scale and clean topology | Skipping transform resets before UV work |
| Material setup | Physically grounded reflectivity and roughness | Guessing color instead of using reference |
| Lighting | Controlled, repeatable reflections | Using a raw HDRI with no contrast editing |
| Render and composite | Physically plausible final polish | Over grading and shifting metal hue |
The full pipeline, including UV strategy and asset prep, is covered step by step in our 3D product rendering workflow guide.
How Does a Studio Approach Metal Product Renders?
Over two decades of commercial post-production, led by Mehmet Turan, 35milimetre has run CGI and retouch work across technology and automotive brands, categories where metal finishes carry a huge share of the perceived product quality. Practical decisions from that experience:
- Bevel strategy stays consistent: macro bevels modeled, micro-wear baked into normal maps, to hit render deadlines without sacrificing the highlight quality clients notice first.
- HDRI choice is almost always a heavily edited studio environment rather than a stock reflection map straight off the shelf.
- AOV sets get exported as standard: specular, roughness, curvature, and normal, every time, so the compositor has full control without a re-render.
Industry case work on heavy metal products shows CGI can cut both cost and production timeline compared to full physical photography setups, particularly for large or hard-to-transport hardware. Whether to bring that work in house or outsource usually comes down to whether the schedule allows for iteration time or the deadline is fixed.
The Overrated Step and the One Nobody Skips
Most tutorials spend their energy on shader nodes and barely mention geometry, which gets the priority backward. A shader with perfect edge tint values on a model with mathematically sharp edges still looks like a render, because there's no highlight for the eye to track along the silhouette. Bevels are cheap to add and expensive to fix in post, so they belong at the start of the pipeline, not the end.
The step people over-invest in is texture resolution. A 4K scratch map on a hero shot rarely reads any differently from a well-authored 2K map once curvature and roughness are doing their job, yet artists burn hours upscaling maps that were never the bottleneck. The actual bottleneck, almost every time, is lighting contrast: a flat HDRI with no edited highlight zones will make even a physically perfect shader look inert.
If you take one thing from this, prioritize reflectivity and edge tint accuracy first, geometry bevels second, and treat texture detail as the polish pass it actually is. Anisotropy and coatings matter, but only after the base physics reads correctly. Skipping straight to scratch maps on a flat-lit, hard-edged model is the single most common mistake we see in portfolio work.
— 35mm
How 35milimetre Can Help With Metal Product Renders
Building a physically accurate metal shader from scratch, then lighting it, baking bevels, and pulling a clean AOV stack, takes real hours most in-house teams don't have on a campaign deadline. The full pipeline can be handled as a managed service including 3D model prep and cleanup, PBR material authoring with reflectivity and edge tint set from reference, studio HDRI lighting, multi-pass renders with the AOV set a compositor needs, and final retouch or composite pass to deliver marketplace-ready imagery.
Turnaround depends on part complexity and how many finish variants a job needs, but most single-product renders move from CAD import to final composite well within a standard campaign timeline. Pricing for 3D Modeling starts from $175 one off, with 3D Render work running $80 to $175 one off depending on complexity and finish count. If your product needs the compositing and retouch pass layered on top, our photo compositing and retouching page outlines what that deliverable looks like. Check current availability and get a quote through the Amazon pricing page to start.
Sources
- 3Delight Metal - 3Delight for Maya (RenderMan) - 3DL Docs
- GLSL anisotropic brushed metal (Unity) — Wikibooks
- Foundry: shader parameters / edge and bevel guidance
- Anisotropic brushed metal tutorial — Autodesk / Arnold
FAQ
What Is the Minimum Setup for a Realistic Metal Render?
You need a physically based shader with correct reflectivity and edge tint, appropriate roughness, a studio HDRI, micro-bevels on hard edges, and at least a roughness and normal map. Anisotropy and scratch layers matter for brushed finishes but aren't required for a smooth polished surface.
Why Does My Metal Render Look Like Plastic?
Usually the edges are too sharp, the roughness value is flat across the whole surface, or the HDRI has no contrast for reflections to pick up. Adding micro-bevels and varying roughness with a curvature-driven map fixes most of this without touching the base color at all.
How Do I Render Brushed Metal Convincingly?
Use an anisotropic shader with separate roughness values along and across the brush direction, driven by tangent and binormal orientation, then layer a fine directional noise map for the visible grain. Lock the UV orientation before final texturing so the grain direction doesn't flip during later edits.
Should I Model Bevels or Bake Them as Normal Maps?
Model visible macro bevels on edges the camera will get close to, and bake finer micro-surface detail into normal maps everywhere else. This hybrid approach keeps render times reasonable while still giving lighting a real edge to catch.
Does 35milimetre Offer Metal Product Rendering Services?
Yes. 35milimetre provides 3D modeling starting from $175, 3D render work priced between $80 and $175 depending on complexity, and compositing or retouch add ons for e-commerce and marketing delivery. Current pricing and service details are listed on the studio's site.