
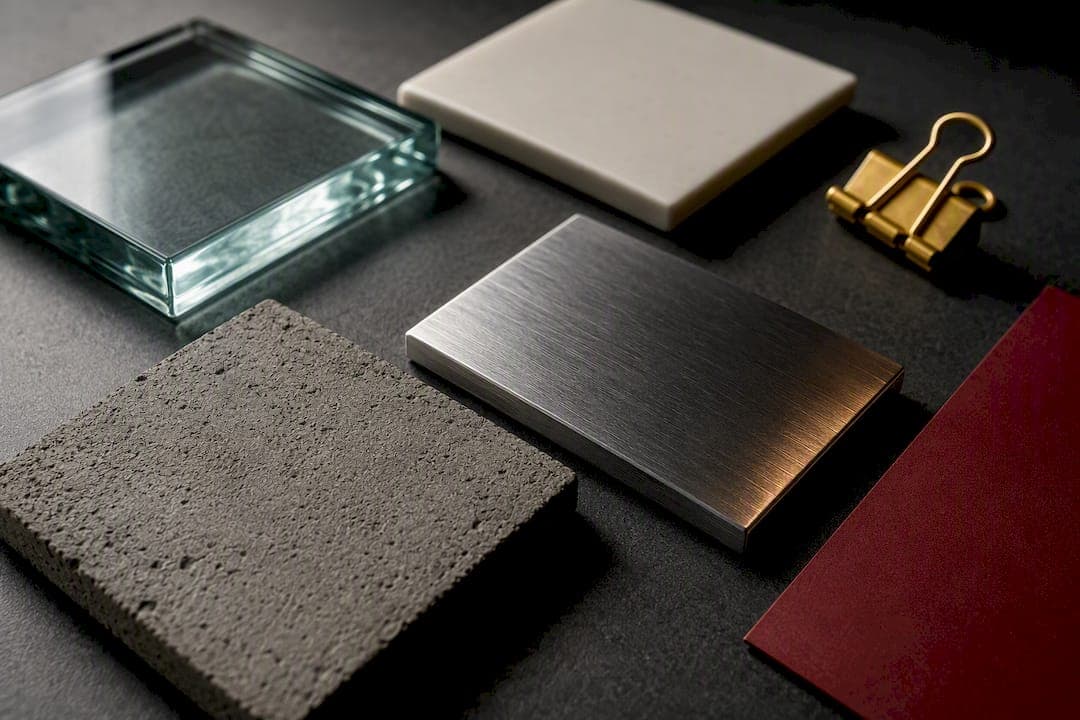
Material realism in CGI means surfaces respond to light the way their real counterparts do, consistently, from every angle and under every light source you throw at them. The single principle to prioritize is a physics-first workflow: build materials on measured values and microfacet behavior first, then adjust for artistic intent, and always check the result against real reference.
TL;DR:
- Using physically accurate reference values for IOR and reflectance reduces iteration time and prevents unrealistic material adjustments.
- Properly authored texture maps should include only raw albedo and lighting-neutral data, avoiding baked-in lighting or shadow information that causes flat-looking materials.
- Layering additional noise and masks procedurally allows scalable, flexible surface wear and detail that adapt to client variations without repainting.
- Final realism depends on matching environment HDRI lighting to the shot's exposure and temperature, avoiding tone mapping surprises during final review.
- Ray-traced engines produce the most accurate material results, especially for complex subsurface scattering and layered effects, but real-time pipelines suffice for interactive work and early look development.
Table of Contents
- What Are the Core PBR Principles Every Artist Must Apply?
- Material Maps: What to Author and Common Production Pitfalls
- Photogrammetry or Material Libraries: Which Should You Use?
- Shaders, BRDF Practice, and Shader-Level Checks
- Microdetail, Edge Handling, and Contact Grounding That Sell Realism
- How Do You Match Lighting and Capture to Your Materials?
- What Belongs on a Lookdev and Verification Checklist?
- Which Tools Actually Speed Up Production Realism?
- 35milimetre's Production-Tested Approach to Material Work
- Common Challenges and Troubleshooting Methods
- The Role of Subsurface Scattering and Translucency in Realistic Materials
- Using Masks and Procedural Textures to Add Material Complexity
- Rendering Performance and Optimization for Realistic Materials
- Comparing Rendering Engines for Material Realism
- Where Material Realism Is Heading Next
- How 35milimetre Helps Teams Achieve Material Realism
- Sources
What Are the Core PBR Principles Every Artist Must Apply?
Physically based rendering rests on one uncomfortable idea for artists trained on "make it look cool": nearly everything reflects light, including matte concrete and dry skin. This is energy conservation, the rule that a surface can never reflect more light than it receives, and it's the backbone of physically based rendering.
Roughness controls how tightly or broadly microfacets scatter that reflection. A mirror-smooth microfacet distribution gives a tight, hot specular highlight; a rough one spreads that same energy into a soft sheen. The Disney principled BRDF packages this into artist-friendly sliders, roughness, metallic, specular, but the sliders only behave correctly when you anchor them to measured IOR and reflectance ranges instead of guessing. Reference values shrink your iteration cycles because you stop chasing a look that physics won't allow.
Material Maps: What to Author and Common Production Pitfalls
A convincing surface needs the full map inventory, not just a hero albedo texture. Base color, roughness, metallic, normal, height, ambient occlusion, and a curvature pass form the working set for most production materials.
The most common pitfall: baked lighting or shadow information sitting inside the albedo map. That single mistake, more than any shader setting, is why materials look flat or "painted on" once they hit a real light rig. Keep albedo flat and lit-neutral, and let your renderer's linear workflow do the actual lighting.
A few production habits that save rework later:
- Reserve height maps for large-scale displacement (mortar joints, wood grain) and normal maps for fine surface detail; baking a high-poly sculpt into normals only works when the source geometry has enough resolution to justify it.
- Match texel density across every asset in a shot. A crate at 512 pixels per meter next to a wall at 2,048 pixels per meter reads as an obvious scale error the instant the camera moves.
- Pack roughness, metallic, and AO into unused RGB channels when your engine allows it to cut texture memory without losing precision.
- Grain size in your scan or procedural noise should match the physical scale of the object, not the resolution of your canvas.
Photogrammetry or Material Libraries: Which Should You Use?
Shoot your own reference when the camera gets close: hero props, anything filling more than a third of the frame, or surfaces with a signature the audience already knows by heart. Photogrammetry captures the micro-geometry that a generic scan simply won't match at that distance.
For everything else, a vetted library is faster and just as reliable. NVIDIA vMaterials offers roughly 2,600 photoscanned materials built on MDL, tuned for physical accuracy and cross-application consistency, and it includes infinite tiling and randomization tools to help reduce visible repetition. Textures and Poliigon cover similar ground with broad category libraries suited to background and set-dressing work.
A short field-tested list for avoiding tile repetition:
- Layer a second, larger-scale noise or dirt pass on top of the base tile to break the pattern the eye locks onto.
- Rotate or offset UVs slightly between repeated instances of the same asset.
- Use your renderer's tile randomization or atlas scattering rather than a single repeating UV tile.
Pro Tip: Treat AI-generated texture maps, including outputs from tools like AI Texture Studio, as a fast first draft. Verify roughness and reflectance values against a real reference sample before they go into a hero shot.
Shaders, BRDF Practice, and Shader-Level Checks
Start every material on your renderer's principled shader, whether that's a Disney-style BRDF node in a DCC tool or its engine equivalent in Unreal or Unity. It handles energy conservation and Fresnel falloff correctly by default, which is more than most custom shader graphs can claim on the first pass.
Complex finishes, car paint clearcoat, brushed metal anisotropy, need a layered approach: a base layer for the substrate and a second specular layer for the coating, each with its own roughness and IOR. Check Fresnel behavior at grazing angles specifically; a shader that looks right head on but goes flat or overly dark at the edges usually has an IOR value that's wrong for the material class.
Reach for custom OSL or HLSL only when the node graph genuinely can't express the behavior, unusual anisotropic patterns or procedural wear driven by simulation data. For the other 90 percent of production materials, a well-tuned node graph is faster to iterate and easier for a teammate to pick up later. Read more on developing high-end visuals for lighting-side decisions that pair with shader work.
Microdetail, Edge Handling, and Contact Grounding That Sell Realism
Perfect edges are the fastest way to expose a CG render. Real-world objects pick up rounding from manufacturing, handling, and wear, so a bevel or round-corner shader on every hard edge is close to mandatory, not optional polish.
Wear and dirt need logic, not randomness. Curvature and cavity maps naturally highlight where a surface would actually scuff or collect grime, along raised edges and inside recesses, so drive your dirt and scratch masks from those passes rather than hand-painting guesses.
- Place micro-scratches along load-bearing edges and handling points, not uniformly across a flat face.
- Use world-space masks for dust so accumulation reads as gravity-driven, not texture-repeat driven.
- Add slight ground-contact compression and a touch of color bleed where an object meets its surface.
Pro Tip: Render a tight crop on just the contact point between object and ground plane. If that crop alone doesn't sell the object's weight, the wider shot won't either.
How Do You Match Lighting and Capture to Your Materials?
An HDRI that doesn't match your camera's exposure and light direction will fight every material decision you made upstream. Pick or shoot environment maps with the same color temperature and dynamic range as your intended shot, and check light direction against your key reference before you commit hours to lookdev.
Envmap estimation tools now let you rotate or relight a captured environment to match set cues after the fact, which is useful when a client reference photo was shot under different conditions than your final render. Fill and rim lights should reveal material response, catching a rough surface's sheen or a metal's anisotropic streak, without overpowering the key light and flattening the read.
Run everything through an ACES or filmic color pipeline from the start. Skipping this step is a common reason two materials that matched in a linear test render suddenly clash once tone mapping gets applied at final delivery.
What Belongs on a Lookdev and Verification Checklist?
Lookdev without a checklist turns into endless subjective tweaking. A short, repeatable process catches the errors that subjective judgment misses:
- Capture real reference, ideally your own camera frames of the actual material, with notes on lighting conditions and camera settings.
- Check specular highlights, edge behavior, subsurface response, and contact shadows against that reference side by side.
- Test the material under at least two different lighting rigs and two focal lengths before calling it final.
- Log render settings and material versions so the asset is reusable on the next project without reverse-engineering your own work.
Skipping step three is the most common shortcut, and it's the one that gets exposed the moment a client requests a different camera angle late in production.
Which Tools Actually Speed Up Production Realism?
Substance Painter remains the default for hand-authoring PBR maps with real-time viewport feedback, while ZBrush handles the sculpt-and-bake side for surface micro-geometry that a 2D texture pass can't replicate. Together they cover most hero-asset material work.
For library sourcing, NVIDIA vMaterials gives you nearly 2,600 photoscanned, physically vetted materials, while Poliigon and Textures.com provide broad category libraries suited to background and set-dressing work.
AI tools like AI Texture Studio and research projects such as RealMat can generate usable PBR map sets in seconds, but every output still needs a physical sanity check before it ships. On the render side, ray-traced engines resolve global illumination and caustics more accurately, while real-time PBR pipelines trade some of that accuracy for interactive feedback during lookdev.
- Substance Painter and ZBrush for hand-authored hero assets
- vMaterials, Poliigon, and Textures.com for vetted library sourcing
- AI Texture Studio and RealMat for rapid drafts pending verification
35milimetre's Production-Tested Approach to Material Work
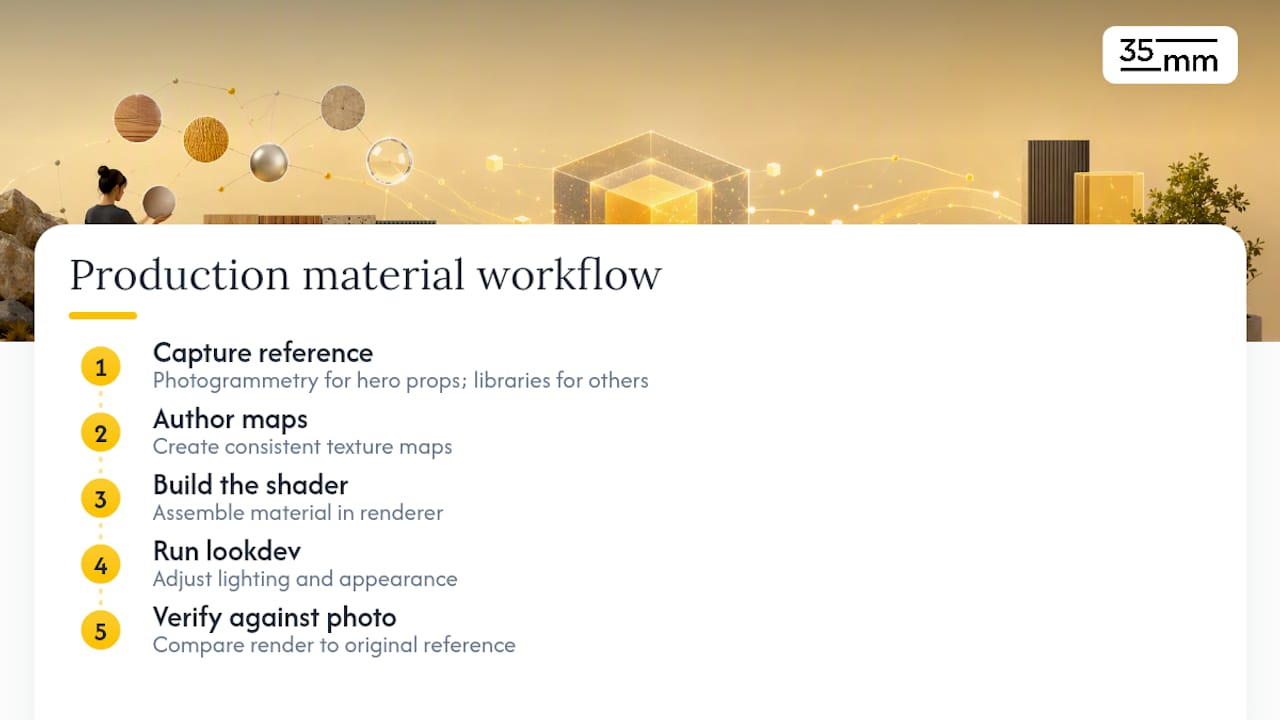
A recommended approach is to build materials in a consistent sequence: capture reference, author maps, build the shader, run lookdev, then verify against the original photo. Following such a sequence helps keep output consistent across technology or automotive campaigns. Photogrammetry gets reserved for hero props filling the frame; libraries handle everything else. It's the same discipline covered in the studio's 3D product rendering workflow.
Common Challenges and Troubleshooting Methods
The most frequent failure in material work isn't a missing map, it's a mismatch between two correct-looking pieces. A roughness value that's accurate in isolation can still look wrong once placed next to a light rig with the wrong color temperature, or a scale that doesn't match the rest of the set.
Visible tiling is the second most common complaint on review calls. The fix is rarely a higher-resolution texture; it's breaking repetition with a secondary detail layer, rotation, or the randomization tools built into libraries like vMaterials.
Flat-looking metal is almost always an energy conservation problem: an albedo value that's too bright for a conductor, since metals shouldn't carry diffuse color the way dielectrics do. Check your metallic mask first before touching roughness.
Materials that look right in the viewport but wrong in a final beauty pass usually point to a color management mismatch, sRGB textures loaded without gamma correction, or a linear workflow break somewhere in the pipeline. Trace it channel by channel rather than adjusting the shader blindly.
When a client says a render "looks CG" but can't say why, the answer is almost always in the details covered above: perfect edges, uniform dirt, or a light rig that doesn't match the reference photo. Walk the lookdev checklist again before touching the shader graph itself. Nine times out of ten, the shader was never the problem.
The Role of Subsurface Scattering and Translucency in Realistic Materials
Subsurface scattering, or SSS, models how light enters a translucent surface, bounces around inside it, and exits somewhere else. Skin, wax, marble, and milk all rely on this behavior, and skipping it is why CG skin so often reads as plastic or rubbery under strong key light.
The mechanism matters for how you set it up. Light doesn't just reflect off skin, it penetrates a few millimeters, scatters off subsurface tissue, and re-emerges shifted in color, usually toward warm reds and oranges at the edges where the surface is thin, like ears or fingers held against a bright light. Subsurface scattering parameters need to account for that scattering radius and color shift, not just a single translucency slider.
Getting SSS wrong in either direction is obvious. Too little, and skin looks like painted plastic with no depth. Too much, and the material turns waxy or glows unnaturally, an effect that shows up constantly in early CG humans that never quite crossed the uncanny valley.
Translucent materials that aren't organic, frosted glass, thin plastic, wax candles, need the same scattering logic but often at a shallower depth and with a tighter color profile. Test these materials backlit specifically, since front lighting rarely reveals whether the scattering behavior is convincing. A rim light or a light source placed behind the object will expose an SSS setup's weaknesses immediately, in a way a beauty-lit hero shot won't.
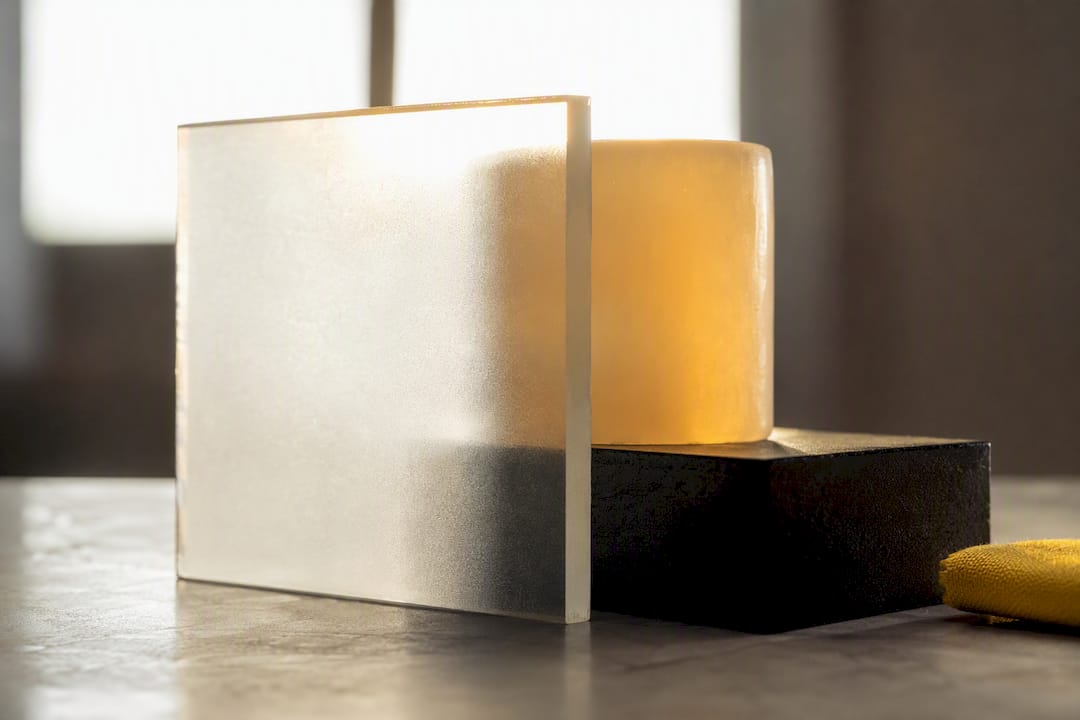
Renderer support varies here. Most production renderers offer at least a basic diffusion-based SSS model now, but the quality of the scattering radius controls and how well they integrate with your existing shader stack differs enough that it's worth testing on a simple sphere before committing to a hero asset.
Using Masks and Procedural Textures to Add Material Complexity
Hand-painted masks are fine for a single asset, but they don't scale, and they rarely hold up when a client requests a variant with different wear patterns. Procedural masks driven by curvature, cavity, and world position give you the same control with far more flexibility to adjust later without repainting anything.
Curvature maps identify convex edges, exactly where real-world wear accumulates first. Cavity maps do the opposite, flagging recesses where dust and grime settle. Combining both into a single wear mask, then layering a noise pattern on top for irregularity, produces results that look organic instead of uniformly distributed.
Procedural textures also solve the scale problem that plagues photoscanned materials. A scan captured at one resolution locks you into that texel density, but a procedural noise pattern, Voronoi cells for cracked ceramic, fractal noise for rust bloom, can be resampled at any scale without the blurring or tiling that stretching a bitmap produces.
The trade-off is authoring time upfront. Building a flexible procedural material graph takes longer than dropping in a scanned texture set, but it pays that time back the moment a client asks for five color variants or a different wear level. Layer masks in this order for the most believable results: base variation first, then curvature-driven wear, then a fine noise pass for irregularity, then a sparse, larger-scale pass for isolated damage like a single deep scratch or chip. Stacking them in that sequence, coarse to fine, mirrors how real wear actually accumulates over an object's life.
Rendering Performance and Optimization for Realistic Materials
Realistic materials are expensive precisely because they need more of everything: higher-resolution maps, more shader layers, and in the case of SSS, extra light bounces that a simple diffuse surface never needs. That cost has to be managed deliberately or render times balloon without a corresponding gain in believability.
Texture resolution is the easiest lever. Not every material in a shot needs a 4K or 8K map set; background props rarely benefit from resolution beyond what the camera distance can actually resolve, so match texel budget to camera proximity rather than defaulting to your highest available resolution across the board.
Channel packing roughness, metallic, and AO into a single RGB texture cuts both memory footprint and the number of texture lookups your shader has to perform per pixel, a meaningful savings across a scene with dozens of unique materials. Displacement is the other major cost center: use it only where silhouette or large-scale surface deformation genuinely needs it, and rely on normal maps for everything else.
SSS and multi-layer materials add render time through extra sampling, so isolate them to hero assets that the camera will actually favor, and fall back to simpler approximations, or skip SSS entirely, on background characters and props. Ray-traced renderers give you the most physically accurate result but at the highest cost; real-time PBR pipelines using rasterization can approximate most of the same material behavior for previews and interactive work, reserving full ray tracing for final beauty passes where the extra accuracy actually shows.
Comparing Rendering Engines for Material Realism
Ray-traced renderers, think Arnold, V-Ray, and similar production path tracers, remain the standard for final-frame material accuracy because they resolve light transport, including SSS, caustics, and multi-bounce reflections, without the approximations real-time engines still rely on. If a hero shot needs to survive close scrutiny, this is where it gets rendered.
Real-time engines built around PBR, Unreal Engine and Unity chief among them, have closed much of that gap for interactive and virtual production work. Their principled shader models handle the core BRDF math correctly, and hardware ray tracing support has narrowed the reflection and shadow quality difference considerably. Where they still trail is in complex SSS and heavily layered materials under difficult lighting, areas where a full path tracer's extra sample budget still wins.
The practical decision usually comes down to delivery format rather than raw quality ceiling. A television commercial or print campaign frame justifies the render time of a full path tracer. A real-time product configurator or a game cinematic needs the interactivity a rasterized PBR pipeline provides, even if it means accepting a slightly lower ceiling on translucency and multi-bounce accuracy. Neither approach is universally better, and most studio pipelines end up using both at different stages, real-time for lookdev iteration, ray tracing for final output.
Where Material Realism Is Heading Next
AI-assisted tools are closing the gap between a rough idea and a usable material faster than most artists expected two years ago. RealMat shows diffusion models can meaningfully improve generated map realism, and Materialist demonstrates that inverse rendering can refine a single photo into physically consistent, editable material properties.
Neither replaces physical verification. Treat these tools as a way to prototype faster and let the checklist, not the model's confidence, decide what ships.
— 35mm
How 35milimetre Helps Teams Achieve Material Realism
Commissioning a specialist studio for lookdev and material work means you get production-ready assets without carrying the trial-and-error cost of building that expertise in-house. Specialist studios handle PBR map authoring, photogrammetry integration, and shader-level lookdev for technology and automotive clients who need CGI that survives close scrutiny in a hero shot.
Every deliverable is built reference-first: real photos, annotated notes, and a verification pass before anything reaches final compositing. That workflow mirrors the practical visual storytelling approach covered in this visual storytelling guide, where material choices carry as much brand weight as the composition itself.
If your next campaign needs materials that hold up under a client's most zoomed-in review, get in touch through the 35milimetre studio page to scope your project and request a quote.