Product image enhancement is the process of correcting and refining raw photos to achieve clear, consistent, marketplace-ready visuals that accurately represent what you sell. On platforms like Amazon and Shopify, where image standards are strict and first impressions are everything, a blurry or poorly lit photo is not just unattractive. It is a direct conversion killer. The good news is that knowing how to enhance product images no longer requires a professional studio budget. With the right capture habits and a structured AI-powered post-processing workflow, even smartphone photos can reach commercial quality. This guide walks you through every stage, from setup to final export.
How to enhance product images: starting with the right capture
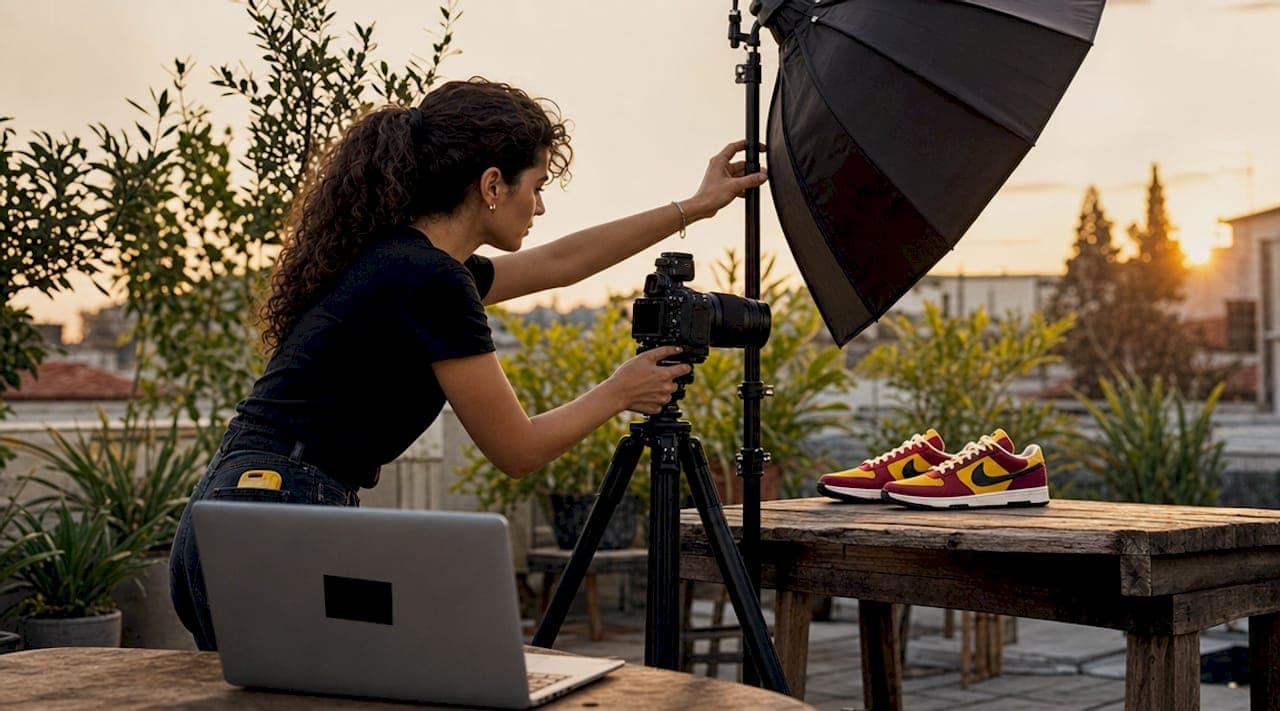
The most overlooked truth in product photography is that no enhancement tool, AI-powered or otherwise, can manufacture detail that was never captured. Every retouching decision you make downstream depends on the quality of your source file. Getting the capture right is not optional prep work. It is the foundation of the entire workflow.
Start with your background. A clean, neutral surface, typically white, light gray, or a brand-consistent solid color, gives AI tools and manual editors a clear edge to work with. Inconsistent or textured backgrounds create masking problems that multiply your editing time. A seamless paper sweep or a simple foam board both work well for most product categories.
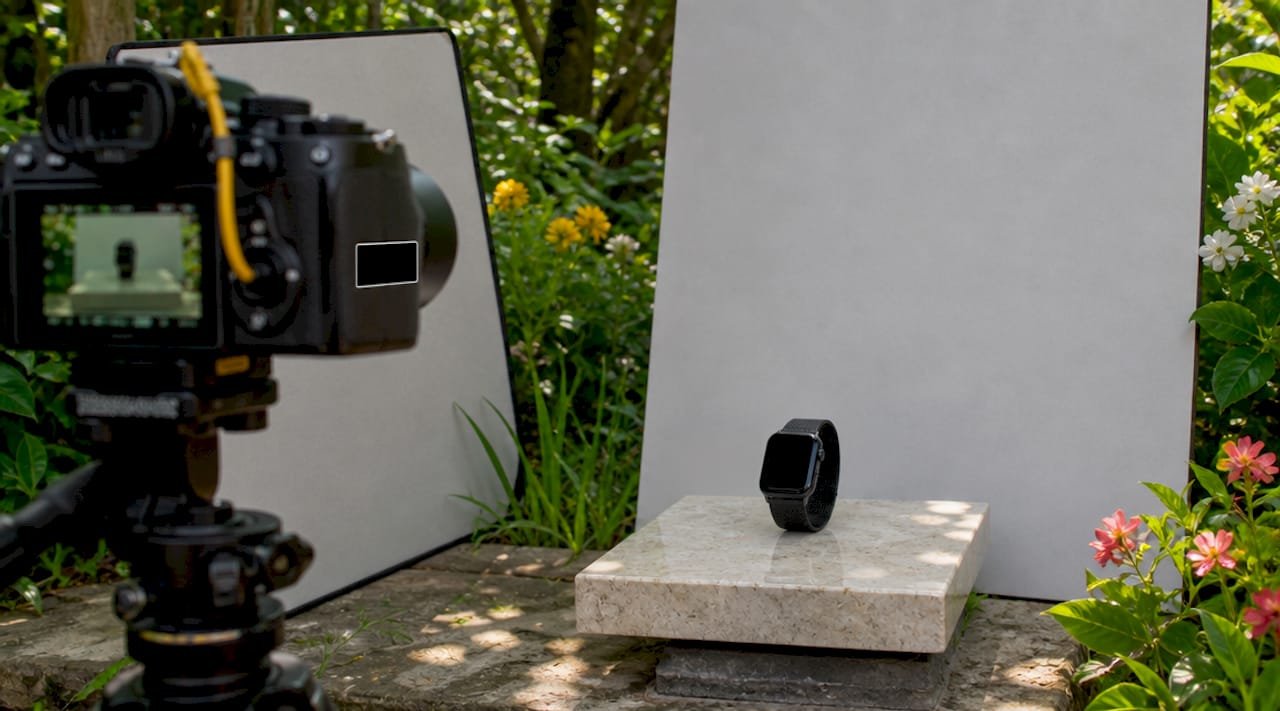
Lighting is where most DIY shoots go wrong. Mixing multiple light sources with different color temperatures creates color casts that are nearly impossible to remove in post. Use a single, well-balanced light source, whether that is a ring light, a softbox, or a north-facing window, and set your camera or phone to manual white balance. Soft, diffused light wraps around the product and minimizes harsh shadows that flatten texture.
Camera settings matter even on a smartphone. Shoot at the highest JPEG quality available, or in RAW if your device supports it. Use manual focus and lock your exposure before each shot. A phone tripod eliminates motion blur at the source, which is far more effective than trying to recover sharpness in post. Shoot multiple angles, including a hero shot, a detail close-up, and at least one lifestyle or context angle, because consistent angles across SKUs enable scalable, uniform AI-generated enhancements across your entire catalog.
Pro Tip: Place a small piece of white foam board opposite your main light source to act as a reflector. This fills in shadows on the product's dark side without adding a second light source, keeping your color temperature consistent.
What does an AI enhancement workflow actually look like?
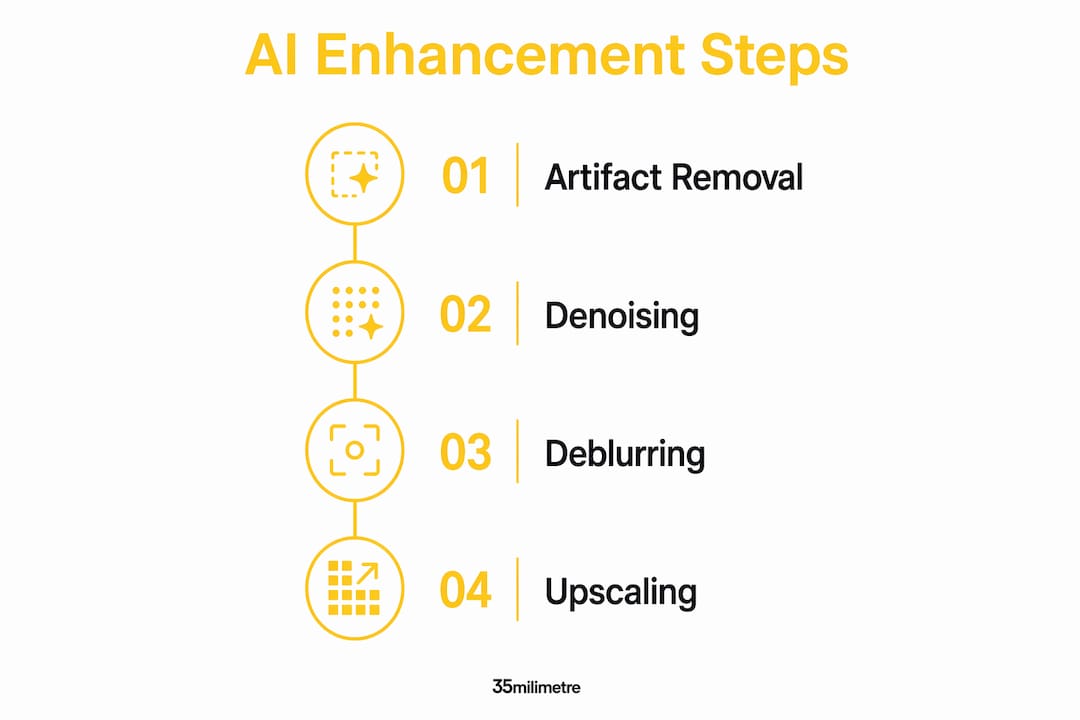
Once you have a solid source image, the real work begins in post-processing. The most common defects in product photos fall into four categories: JPEG compression artifacts, digital noise or grain, motion blur, and low resolution. Each requires a different correction tool, and the order of operations matters more than most people realize.
The correct sequence is as follows.
-
Artifact removal. Multiple saves of a JPEG file cause compression halos and banding that degrade sharpness. Run your image through a dedicated artifact remover first. Tools like ArtImageHub's artifact remover target these compression patterns specifically, cleaning the file before any other correction is applied.
-
Denoise. After artifacts are cleared, apply a denoiser to address grain introduced by high ISO settings or low-light capture. Denoising on a clean, artifact-free file produces far smoother results than denoising a compressed image, where the tool cannot distinguish grain from compression noise.
-
Deblur. Motion blur and soft focus are addressed at this stage. AI denoisers and deblurrers have brought DIY product photos close to professional quality for marketplaces like Etsy and Amazon, but they work best when the image is already clean. Applying deblur before denoising forces the tool to sharpen noise alongside the product, which creates an unnatural, gritty result.
-
Upscale. With a clean, sharp image, upscaling adds resolution without amplifying defects. AI upscalers like those built into ArtImageHub's enhancer use learned detail patterns to add pixels intelligently rather than simply stretching the image.
| Step | Tool type | Problem solved | Why this order |
|---|---|---|---|
| 1. Artifact removal | Compression cleaner | JPEG halos, banding | Cleans file for all subsequent steps |
| 2. Denoise | AI denoiser | Grain, digital noise | Works best on artifact-free input |
| 3. Deblur | AI deblurrer | Motion blur, soft focus | Sharpens clean signal, not noise |
| 4. Upscale | AI enhancer | Low resolution | Adds pixels to an already sharp file |
For large catalogs, batch processing by defect type speeds up the workflow considerably. Sort your images into groups labeled "Artifacts," "Grain," and "Blur/Low-res" before you begin, then run each group through its corresponding tool in sequence. This approach cuts processing time and keeps your corrections consistent across product lines.
Pro Tip: Before running any AI tool, export a duplicate of your original file and keep it untouched. AI corrections are not always reversible, and having the source file means you can re-process with updated tools as the technology improves.
AI tools effectively correct exposure, dynamic range, and sharpness on smartphone photos, enabling professional-quality visuals without a studio setup. That said, AI enhancement is appropriate when the source image is fundamentally sound. If the product is out of focus due to a focus failure rather than motion, no deblurring tool will reconstruct the missing detail. Reshooting is the only real fix in that scenario.
Common mistakes that undermine product photo quality
Even with the right tools and workflow, certain habits consistently produce poor results. Recognizing these patterns early saves significant time and protects your brand's credibility.
The most damaging mistake is over-editing. Excessive saturation or heavy filters reduce customer trust and misrepresent product quality. When a customer receives a product that looks noticeably different from its listing photo, returns increase and reviews suffer. The goal of enhancement is improvement without transformation. Think of it as one still frame standing in for a physical experience. That frame needs to be honest.
Other common errors include:
- Ignoring JPEG degradation. Saving the same file multiple times in Photoshop or a phone's gallery app accumulates compression artifacts. Always work from the original capture file, not a previously exported version.
- Inconsistent backgrounds across SKUs. Switching between white, gray, and lifestyle backgrounds within the same product category fragments your catalog's visual identity and signals a lack of professionalism to buyers.
- Mixed lighting between sessions. Shooting half your catalog under a ring light and the other half near a window creates color temperature inconsistencies that are difficult to batch-correct later.
- Ignoring texture and label accuracy. AI tools that over-smooth surfaces can erase fabric grain, leather texture, or printed label details. Always zoom in to 100% and compare before and after to confirm that material character is preserved.
"Professional retouching focuses on subtle improvements like neutral lighting and color balance without altering product appearance. The goal is to avoid artificial or misleading visuals while maintaining customer trust." — Photoroom's enhancement principles
AI enhancement cannot recover detail from fundamentally out-of-focus photos. When you encounter an image where the product itself is soft from a focus failure, the right call is a reshoot, not a heavier processing pass. Knowing when to stop editing and start over is a professional skill that saves both time and brand equity. For guidance on building a consistent visual identity across your catalog, the 35milimetre guide on creating product visuals that support brand identity is worth reading alongside this workflow.
Manual editing vs. AI enhancement: which approach fits your needs?
The choice between traditional photo editing and AI-powered enhancement is not binary. Most professional workflows use both, but understanding where each method excels helps you allocate time and budget correctly.
Manual editing in tools like Adobe Photoshop or Lightroom offers precise creative control. You can make nuanced color grading decisions, composite backgrounds with exact masking, and apply brand-specific adjustments that no AI tool currently replicates. The tradeoff is time. A skilled retoucher might spend 20 to 45 minutes on a single hero image to achieve that level of polish.
AI enhancement tools prioritize speed and technical defect correction. They are purpose-built to fix noise, blur, artifacts, and resolution at scale, and they do it in seconds per image. For a catalog of 200 SKUs, the efficiency advantage is not marginal. It is transformational. The limitation is that AI tools make probabilistic decisions based on training data. They do not understand your brand guidelines, your product's intended mood, or the specific way a fabric should catch light.
| Factor | Manual editing | AI enhancement |
|---|---|---|
| Cost | High (time or freelancer fees) | Low (subscription or per-image) |
| Speed | Slow (minutes per image) | Fast (seconds per image) |
| Skill required | High | Low to moderate |
| Scalability | Limited | High |
| Creative control | Full | Limited |
| Technical defect correction | Moderate | Excellent |
The hybrid workflow is the professional standard for serious e-commerce brands. Use AI tools to handle technical corrections across the full catalog, then apply manual retouching selectively to hero images, campaign shots, and any product where texture, color accuracy, or brand styling demands a human eye. This approach is also how 35milimetre structures post-production workflows for clients who need both speed and quality at scale.
Key takeaways
Effective product image enhancement combines disciplined capture practices with a structured AI workflow, and the quality of your source file determines the ceiling for every tool you apply afterward.
| Point | Details |
|---|---|
| Capture quality sets the ceiling | No AI tool recovers detail that was never in the original photo. |
| Order of AI steps matters | Always run artifact removal, then denoise, then deblur, then upscale for best results. |
| Over-editing damages trust | Excessive filters or smoothing misrepresent the product and increase return rates. |
| Batch by defect type | Sorting images into defect categories before processing speeds up catalog enhancement. |
| Hybrid workflows win | Use AI for technical corrections at scale, then apply manual retouching to hero and campaign images. |
Why AI enhancement still needs a human in the room
We have spent years at 35milimetre integrating AI tools into commercial retouching workflows, and the pattern we see most often is this: brands adopt AI enhancement enthusiastically, get fast results, and then gradually push the settings too far. The images start to look plastic. Skin on lifestyle models loses pore texture. Fabric loses weave. Metal loses the micro-scratches that make it look real rather than rendered.
The fix is not less AI. Smarter, domain-specific AI that targets product materials and textures keeps images natural and credible. But even the best tool needs a human style guide to work against. Before you run any batch enhancement, define what "correct" looks like for your brand. Write it down. What color temperature is standard? What level of shadow is acceptable? How much texture should be visible on your primary material? These decisions cannot be delegated to an algorithm.
We also believe that scaling e-commerce visuals hinges more on standardizing image inputs than on the raw power of enhancement tools. The brands that get the most out of AI are the ones that shoot consistently, not the ones that buy the most expensive software. Consistent backgrounds, consistent lighting, consistent angles. That discipline is what makes AI enhancement predictable and repeatable across hundreds of SKUs. Without it, you are correcting chaos one image at a time.
The future of product photography is a collaboration between AI speed and human judgment. Neither replaces the other. The studios and brands that understand this will produce better visuals faster than those chasing either extreme.
— 35mm
Take your product visuals further with professional post-production
If your catalog has grown beyond what a DIY workflow can handle, or if your hero images need the kind of polish that wins shelf space on major retail platforms, 35milimetre's commercial retouching services are built for exactly that.
35milimetre brings over two decades of hands-on post-production experience to product image work, from compositing and color grading to AI-assisted batch enhancement and full catalog retouching. The studio works directly with e-commerce brands, ad agencies, and professional photographers who need marketplace-ready imagery at a professional standard. Whether you need a single campaign hero or a full SKU library processed to brand spec, the team delivers visuals that represent your product accurately and compellingly. Visual content strategy is increasingly central to e-commerce growth, and strong product imagery is where that strategy starts.
FAQ
What does it mean to enhance a product image?
Product image enhancement is the process of correcting technical defects such as noise, blur, and compression artifacts, and improving clarity, color balance, and resolution so the image accurately represents the product. The goal is improvement without altering the product's actual appearance.
What order should I apply AI enhancement tools?
The correct order is artifact removal first, then denoising, then deblurring, then upscaling. Each step prepares a cleaner input for the next, and reversing the order produces lower-quality results.
Can AI fix a blurry product photo?
AI deblurring tools can correct motion blur effectively, but they cannot recover detail from a photo that is out of focus due to a focus failure. If the product itself was never in sharp focus during capture, reshooting is necessary.
How do I keep product colors accurate after editing?
Use a single, consistent light source with manual white balance during capture, and avoid heavy saturation adjustments in post. Always compare your edited image against the physical product at 100% zoom before exporting.
When should I hire a professional retoucher instead of using AI tools?
Hire a professional retoucher for hero images, campaign shots, and any product where brand-specific color grading, compositing, or texture accuracy is critical. AI tools handle technical corrections at scale well, but nuanced creative decisions benefit from human expertise.