

An exploded view render pulls a product's components apart along a controlled axis so viewers can see how the parts fit together and relate to each other. Teams use them as marketing hero assets, technical documentation for manuals, and interactive product explorers on e-commerce or support pages, leveraging AI-assisted creative resources like the Product Benefits Generator to enhance product messaging and callouts. This guide covers all three formats: static images, animated sequences, and interactive WebGL viewers, with the production steps to get from CAD model to finished deliverable.
TL;DR:
- Static images are ideal for print manuals, spec sheets, and hero shots due to their quick production and control over composition.
- Interactive WebGL viewers support user-driven rotation, part isolation, and BOM overlays, with file size limits around 40 MB for smooth browser performance.
- Hierarchical automation and careful assembly hierarchy preservation during CAD import reduce errors and rework in exploded view creation.
- Exploded views designed for marketing should focus on few, meaningful separations to avoid visual clutter, with selective clustering of components.
- Clear briefs including CAD files, target formats, and usage context help streamline production, whether for one-off campaigns or ongoing documentation needs.
Table of Contents
- What Types of Exploded Views Exist, and When Should You Use Each?
- Where Exploded Views Actually Move the Needle: Marketing, Docs, and Training
- How Do You Build an Exploded View From a CAD Model?
- What Are the File-Size and Performance Limits for Interactive Exploded Views?
- How Do You Style an Exploded View Without Cluttering It?
- How Does 35milimetre Produce Exploded View Renders for Clients?
- What Most Guides Get Wrong About Exploded View Production
- How to Brief a Studio for Exploded View Renders
- Sources
- FAQ
What Types of Exploded Views Exist, and When Should You Use Each?
Not every exploded view needs to move, rotate, or respond to a click. The format you choose should match where the image will live and what job it needs to do.
Static exploded images are fixed renders, typically PNG or TIFF, built for print catalogs, spec sheets, or a single hero shot on a landing page. They're the fastest to produce and the easiest to control artistically, because you're composing one frame instead of a sequence that has to hold up from every angle.
Animated explodes (MP4 or GIF) show the assembly pulling apart and reassembling over time. These work well for social ads, product pages, and trade show loops where you want motion to catch attention but don't need viewer interaction.
Interactive WebGL or HTML5 viewers let the user drive the experience: rotate the model, isolate a part, or scrub through the explosion sequence themselves. According to the SolidWorks DraftSight blog, static exploded images work as fixed deliverables for print and documentation, while interactive versions add rotation, part isolation, and playback control that a flat image simply can't offer.
Cutaway and x-ray variants slice through housings instead of separating them, useful when you need to show internal wiring or fluid paths without a full disassembly.
Here's how the formats stack up by use case:
- Print manuals and spec sheets: static PNG/TIFF, no interactivity needed, smallest production overhead.
- Marketing hero shots and ads: static or animated, prioritizes lighting and composition over technical completeness.
- Engineering documentation (IPC/S1000D): hierarchical static sequences with strict part numbering, built for compliance, not visual flair.
- Training and AR/VR: interactive or 3D PDF, where the viewer needs to manipulate the model to learn from it.
The decision usually comes down to one question: does the viewer need to do something with the model, or just understand it at a glance? If it's the latter, stop at a well-composed static render. Interactivity adds real value, but it also adds cost and file-size constraints you don't need to take on for a single print asset.
Where Exploded Views Actually Move the Needle: Marketing, Docs, and Training
Exploded views earn their production cost by cutting down the time it takes someone to understand how a product works. A single well-composed image can replace paragraphs of written assembly instructions, which is exactly why manufacturers lean on them for anything with more than a few parts.
The deliverable should match the business goal, not the other way around:
- Marketing packshots with a partial explosion communicate craftsmanship and complexity without a full teardown, common in tech and automotive advertising.
- Step-by-step assembly sequences reduce support tickets by showing, rather than describing, which part goes where and in what order.
- BOM overlays (bill of materials layered directly onto the render) let procurement and service teams identify part numbers without cross-referencing a separate document.
- Interactive explorers on product pages let shoppers inspect build quality before buying, which matters most for higher-ticket items where trust drives the purchase decision.
Interactive adoption is accelerating. Browser-based tools built for exploded views commonly accept CAD-derived files up to around 40 MB while still supporting orbit controls, part highlighting, and BOM overlays, without requiring the end user to know anything about 3D software. That ceiling shapes almost every decision downstream, from mesh count to texture resolution.
The business case is straightforward once you separate the deliverable types. A packshot sells the product. An assembly sequence supports the product after the sale. A BOM overlay speeds up the people who service or restock it. Trying to make one render do all three jobs usually produces something that satisfies none of them particularly well. Our piece on the advantages of 3D rendering for design professionals covers how these renders influence purchase decisions and design communication beyond just the disassembly context.
How Do You Build an Exploded View From a CAD Model?
The pipeline runs from raw CAD data to a polished export, and skipping steps here is where most exploded views end up looking either technically broken or visually flat.
- Import native CAD data and preserve the assembly tree. Bring the model in through STEP AP242, JT, or the native format rather than a flattened mesh export. The assembly hierarchy, part names, and parent-child relationships need to survive the import, because everything downstream depends on that structure.
- Run a hierarchical explosion algorithm, then refine by hand. Tools like 3DViewStation analyze the assembly tree and calculate expansion directions automatically, with a dynamic amplitude slider to control how far parts separate. Automation gets you 80% of the way there; manual adjustment fixes the collisions and awkward overlaps the algorithm can't judge on its own.
- Prepare the model for export. Split single-mesh geometry into multi-mesh components, name every part clearly, set sensible pivot points, strip invisible or duplicate geometry, and build lower-detail LODs (level-of-detail meshes) for anything headed to the web.
- Save named explosion states and add annotations. Lock in specific views (fully assembled, 25% exploded, fully exploded) as named states so you can jump between them instead of rebuilding the pose each time. Layer in leader lines, part callouts, and BOM overlays at this stage, not earlier, since they need to reference final part positions.
- Export to the right targets for each channel. PNG or TIFF for print, MP4 for animated sequences, GLB/GLTF for web viewers, and 3D PDF (PRC format) for manuals that need to stay interactive inside a document. Larger catalogs benefit from batch export APIs rather than manual re-export for every part variant.
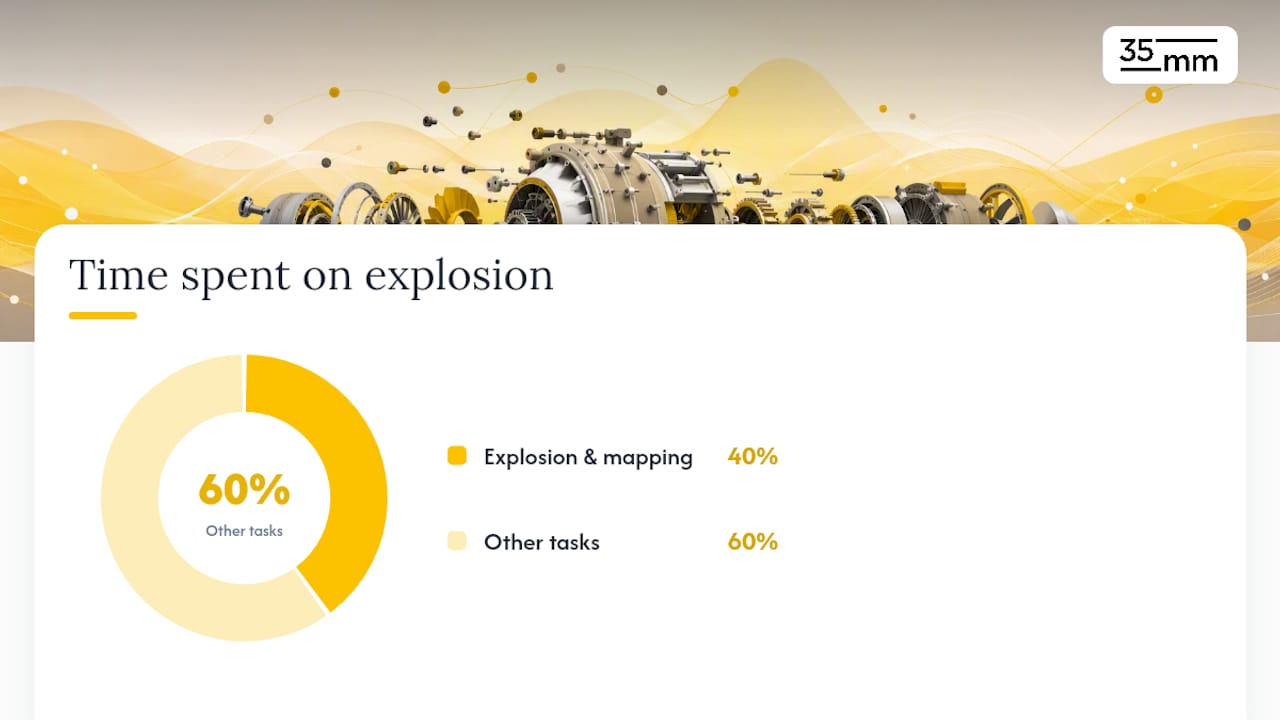
Manual explosion work isn't a small line item, either. Illustrators can spend up to 40% of their time on the explosion and part-mapping stage alone, which is why hierarchical automation tools have become standard on larger assemblies rather than a nice-to-have.
Pro Tip: Build your deliverable checklist before you touch the render. Marketing needs a clean hero angle, brand-consistent lighting, and maybe two or three exploded states. Engineering needs every fastener labeled, exact part numbers, and compliance with whatever standard (S1000D, IPC) governs the manual. Trying to satisfy both from a single render setup almost always means redoing one of them later.
For a deeper look at how these stages fit into a full production workflow, our guide to CGI workflows breaks down asset prep, lighting, and compositing in more detail.
What Are the File-Size and Performance Limits for Interactive Exploded Views?
Interactive exploded views live or die on file size. A gorgeous model that takes twelve seconds to load on a product page will lose more customers than it converts, so performance planning has to happen before you start modeling, not after.
Browser-based viewers built for this purpose typically top out around 40 MB for a CAD-derived asset, and that number is worth treating as a hard ceiling rather than a suggestion. Academic implementations of "explodable" web components, including the exView3D research out of the University of Washington, point to WebGL and Three.js as the practical foundation for this kind of interaction: light enough to run in a browser tab, capable enough to handle orbit, isolation, and animated playback at once.
Multi-mesh GLB files are the standard here for a reason. They let the engine animate or reposition individual parts independently, which is exactly what an exploded animation requires. Single-mesh exports force you into workaround techniques, like band-slicing or volumetric shader tricks, that rarely look as clean and often break under closer inspection.
A few tactics keep interactive scenes fast without stripping out the detail that makes them useful:
- Build LODs so distant or hidden parts load in lower resolution.
- Clean up geometry before export, removing internal faces the camera will never see.
- Bake lighting into textures instead of relying on real-time shadow calculations.
- Combine textures into atlases to cut down on draw calls.
- Lazy-load secondary components so the initial scene appears fast.
- Compress meshes with Draco compression inside the GLTF pipeline.
Common interactive features worth building in from the start include orbit controls, component isolation on click, named scene states tied to buttons, BOM overlays, and, increasingly, AR integration for mobile viewing. A Three.js-based product explorer can handle most of this out of the box: camera transitions, visibility toggles per component, and native GLTF/GLB compatibility.
How Do You Style an Exploded View Without Cluttering It?
The most common mistake in exploded-view production is exploding everything at once. Pulling apart every screw, washer, and bracket in an assembly turns a clear diagram into visual noise, and viewers lose the thread within a few seconds.
Selective sub-assembly explosion solves this. Instead of separating every part, group fasteners and small hardware into logical clusters and explode those clusters as units. This keeps the render legible while still showing meaningful relationships between major components.
A few compositional tools do most of the heavy lifting for clarity:
- Connector lines and leader balloons guide the eye from a part back to its label without forcing the viewer to guess.
- Depth-based desaturation mutes background components so the focal part reads clearly against the rest of the assembly.
- Selective depth of field blurs parts outside the main subject, borrowed directly from photography, and works well for marketing hero shots.
- Material and lighting choices should shift depending on the goal: photoreal shading and studio lighting for marketing, flat schematic shading and even lighting for technical manuals where accuracy matters more than mood.
Background and framing decisions matter more for marketing than for documentation. A hero shot benefits from negative space around the exploded axis and a background that doesn't compete with the product's material finish. Technical illustrations, by contrast, do better on plain white or light gray so nothing distracts from the callouts.
Accessibility deserves a mention here too, since exploded views frequently end up inside PDFs distributed to a wide range of readers. High-contrast callout colors help readers with low vision distinguish labels from background geometry, and any manual distributed as a static PDF should include descriptive alt text for each exploded image, not just the file name.
Pro Tip: When in doubt about how far to explode a component, ask whether removing that separation would cost the viewer any understanding. If the answer is no, collapse it back into the group. Every unnecessary gap is one more thing competing for attention. For visual reference on how this plays out across different product categories, our roundup of 3D design examples is worth a look.
How Does 35milimetre Produce Exploded View Renders for Clients?
35milimetre approaches exploded view work the same way it approaches any CGI project: asset intake first, then structure, then polish. That sequence matters more than it sounds. A team with over two decades of post-production and visual storytelling experience knows that fixing a bad assembly hierarchy after lighting and compositing is far more expensive than catching it during import.
The studio's three-person core, a post-production artist, a graphic designer, and a 3D artist, means every exploded render gets both technical accuracy and a marketing eye before delivery, with additional specialists brought in when a project's scope calls for it. That structure suits clients who need renders that satisfy an engineering brief and still look sharp in an ad campaign.
If you're weighing whether to build exploded views in-house or hand the project to a studio, the honest answer depends on volume and skill overlap. A one-off hero shot for a launch campaign is usually faster and cheaper to outsource than to staff internally. Recurring technical documentation for a large product line might justify an in-house pipeline. Either way, a clear brief, covering CAD files, target formats, and usage context, determines how smoothly the project runs. Our guide to CGI visualization covers more on how these production decisions play out across different visualization needs.
What Most Guides Get Wrong About Exploded View Production
Most advice on this topic treats exploded views as either an engineering problem or a marketing problem, rarely both at once. That split is where a lot of production budgets get wasted. Teams build a technically perfect hierarchical explosion for a manual, then discover marketing wants the same asset for a campaign and has to start over because the lighting, framing, and part selection were never built for a hero shot.
The pipeline advice in this guide, preserving the CAD assembly tree, using hierarchical explosion algorithms, exporting to the right formats, works regardless of who the final audience is. What changes is styling and restraint. Engineering documentation should explode close to everything the compliance standard requires. Marketing should explode almost nothing beyond what tells the visual story.
The overlooked point is sequencing. Do the technical work first, since manual rework on a badly structured model costs far more time than adding polish to a technically sound one. If you take one thing from this guide, prioritize getting the assembly hierarchy and named explosion states right before you touch lighting or composition. Everything else is easier to fix later.
— 35mm
How to Brief a Studio for Exploded View Renders
A good brief saves everyone rework. Include your CAD files with the assembly tree intact, reference images or competitor examples showing the look you want, target formats and dimensions, where the asset will actually be used (a landing page hero versus a printed manual changes almost every production decision), and your delivery deadline.
Our studio works on a per-project basis rather than a subscription, so you're not locked into a retainer to get a single campaign-grade exploded render or a full set of documentation visuals. That matters if your need is a one-off product launch asset rather than an ongoing production pipeline you'd have to staff and manage yourself. Typical turnaround depends on assembly complexity and how many formats you need delivered, but a defined brief with clean CAD data generally helps move the project along more efficiently. If you're planning marketing packshots, an interactive product explorer, or documentation-grade sequences, send your CAD files and reference material to 35milimetre for a brief review and a scoped quote.
Sources
- ExplodeView — interactive viewers and web-based exploded views
- Interactive CAD exploded views and automated explosion via 3DViewStation — CAD Interop
- exView3D research paper — University of Washington / SIG
FAQ
What Are the Different Types of Exploded Views?
The main types are static images for print, animated MP4 or GIF sequences for motion, interactive WebGL or HTML5 viewers for user-driven exploration, and cutaway or x-ray variants that slice through housings instead of separating them fully.
How Much Do Studios Typically Charge for 3D Renderings?
Pricing varies widely based on assembly complexity, number of formats delivered, and whether the project includes interactive elements, so it's best discussed directly with a studio against a specific brief rather than estimated from a general range. 35milimetre prices projects individually based on scope.
What Is an Example of an Exploded Render in Practice?
A common example is a consumer electronics product, like a wireless earbud case, shown with its shell, battery, circuit board, and speaker components pulled apart along a single axis, often used as a hero image on a product page or in a technical teardown.
What Is an Exploded View?
An exploded view is a rendering technique that separates a product's individual components along a controlled axis to reveal how the parts fit together and relate to each other, used in everything from print manuals to interactive product explorers, as detailed in SolidWorks/DraftSight's overview.