
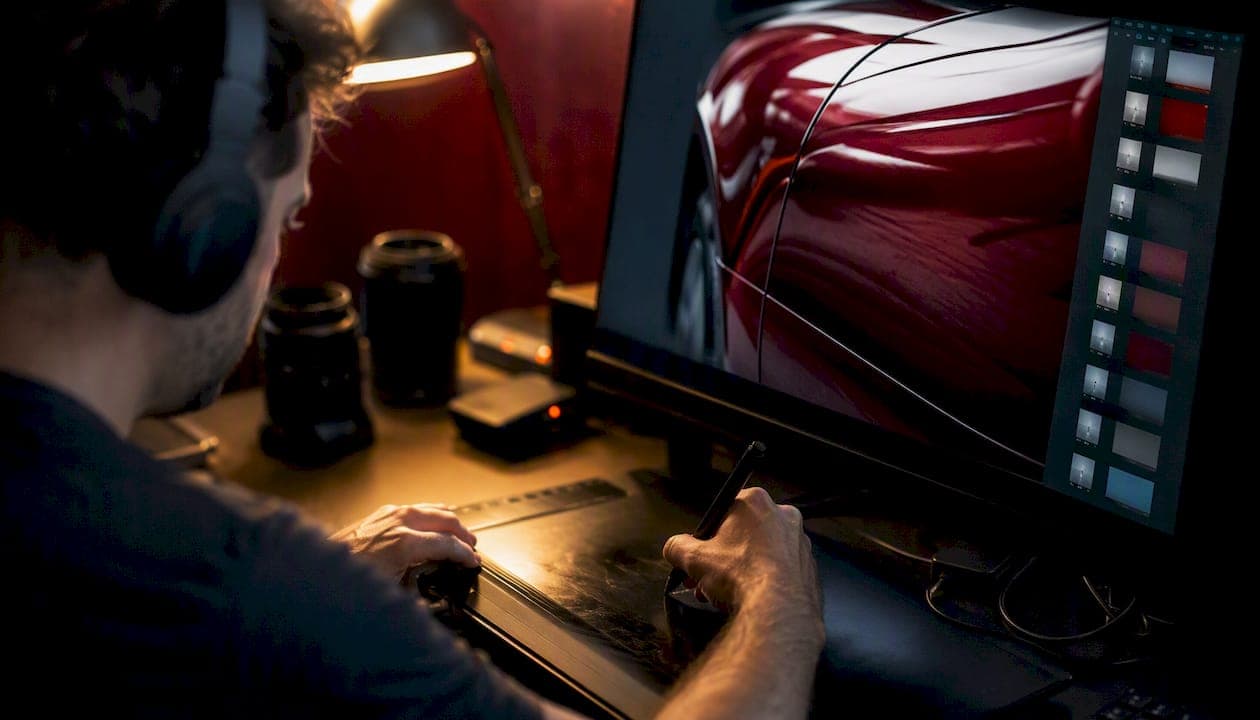
Automotive retouching is the studio craft of cleaning, correcting, and enhancing vehicle images so they read as product-correct and sale-ready for marketing or editorial use. It's the difference between a phone snapshot on a dealer lot and the hero shot on a manufacturer's homepage. Most jobs come down to four core tasks: cleanup (removing dust, scratches, and stray reflections), color and tone correction so the paint reads true to the actual vehicle, reflection management on glass and body panels, and final sharpening and export for whatever channel the image is headed to.
Marketing and sales imagery tends to prioritize speed and consistency across a catalog. A dealership needs a hundred listing photos to look uniform by Friday. Editorial and campaign work, by contrast, often calls for full scene composites, matched lighting, and paint that holds up to a brand's exact color specification. Knowing which bucket your project falls into changes almost everything about the workflow.
Here's a rough guide for deciding who should touch the file:
- DIY works for single-vehicle listings, quick social posts, or when the source photo is already clean and well-lit.
- DIY works if you're comfortable in Adobe Lightroom for basic color and exposure fixes and don't need compositing.
- Hire a pro when you're dealing with metallic or pearlescent paint that needs to match a brand color standard.
- Hire a pro for catalog-scale volume, background replacement, or any image where usage rights and brand consistency matter.
Key Takeaways
Automotive retouching succeeds when workflow discipline, color-accurate technique, and the right hire for the job's complexity all line up.
| Point | Details |
|---|---|
| Know your use case | Marketing/catalog work prioritizes consistency; editorial and campaign work often needs full compositing. |
| Follow a repeatable workflow | Preflight, masking, cleanup, reflections, color correction, dodge and burn, then sharpening and export. |
| Metallic paint needs extra care | Capture multiple angles and swatch references since color flop makes single-shot correction unreliable. |
| Use AI for bulk tasks | Background removal and batch color harmonization work well with AI; paint-critical work still needs human review. |
| Hire a pro for scale or compositing | High-volume catalogs and full scene creation are where a studio like 35milimetre earns its cost over DIY editing. |
Table of Contents
- A Step-by-Step Automotive Retouching Workflow
- Core Manual Techniques Every Retoucher Should Know
- Which Software and Hardware Do Automotive Retouchers Use?
- Why Metallic and Pearlescent Paint Are Hard to Retouch
- Basic Cleanup vs Full Scene Creation: What's the Difference?
- What Determines Automotive Retouching Cost?
- Where AI Helps and Where It Falls Short
- What Files and Specs Should You Send to a Retoucher?
- When Should You Hire a Professional Retoucher?
- What a Professional Studio Workflow Actually Looks Like
- Speed vs Precision: An Editorial Take on Production Trade-offs
- A Faster Path to Product-Correct Automotive Images
- Sources
A Step-by-Step Automotive Retouching Workflow
A repeatable sequence beats reinventing the process on every vehicle. Professional retouchers tend to move through the same six stages regardless of whether the car is a compact hatchback or a supercar, adjusting time and intensity per stage based on how clean the source file already is.
- Preflight and review (5-10 minutes). Check the RAW file for exposure, focus, and composition problems before you touch a single pixel. Flag anything that can't be fixed in post so you're not discovering a fatal issue two hours in.
- Masking and clipping path (10-20 minutes). Isolate the vehicle from its background using the pen tool or a channel-based mask, especially if a background swap is planned.
- Cleanup pass (15-30 minutes). Remove dust, water spots, badge smudges, and unwanted reflections using healing and clone tools.
- Reflection management (10-25 minutes). Rebuild or refine reflections on glass, chrome, and body panels so they align with the actual lighting environment.
- Color and tone correction (15-20 minutes). Bring the paint to its true color and adjust global contrast and warmth without pushing it past what the manufacturer would consider accurate.
- Dodge and burn for form (10-15 minutes). Sculpt the body's curves and creases with subtle light and shadow work to emphasize the sheet metal's shape.
- Sharpening and export (5-10 minutes). Apply output sharpening appropriate to the final use, whether that's a web JPEG or a large-format print file.
A standard automotive retouch runs about 45 minutes for straightforward work, though anything involving compositing or paint correction on metallic finishes takes considerably longer.
Pro Tip: Name your layers by function, not by number. "Reflections, Glass" tells the next person working on the file exactly what they're looking at. Keep every adjustment non-destructive with adjustment layers and smart objects, so a client revision doesn't mean starting over.
Before you move to the next stage, glance back at the previous one. A few habits worth building into your process:
- Compare the masked cutout against the original at 100% zoom to catch hair-thin edge errors around mirrors and wheel wells.
- Check reflections against the light source direction before finalizing color.
- Flag any panel where the dodge and burn work looks obviously painted on rather than photographic.
Core Manual Techniques Every Retoucher Should Know
Software handles the mechanics, but the technique determines whether an image looks touched up or looks real. Five methods show up in nearly every professional automotive retouch, and each solves a different kind of problem.
Frequency separation splits an image into a texture layer and a color/tone layer, letting you smooth out surface imperfections like dust and swirl marks without softening the underlying detail. It's most useful on hoods, doors, and any large painted surface where micro-scratches distract from an otherwise clean shot.
- Duplicate the base layer twice.
- Blur one copy heavily to isolate low-frequency color and tone information.
- Use the Apply Image command to extract high-frequency texture data on the second copy.
- Retouch the low-frequency layer for color evenness and the high-frequency layer for texture defects, separately.
- Flatten once both passes look clean at full resolution.
The biggest watchout: over-smoothing the low-frequency layer erases the metallic fleck and clear-coat texture that makes paint look like paint. Push too far and the car looks like it's wrapped in vinyl.
Dodge and burn lightens and darkens specific areas to reinforce a shape's form, which on a vehicle means emphasizing the way light wraps around a fender or door crease.
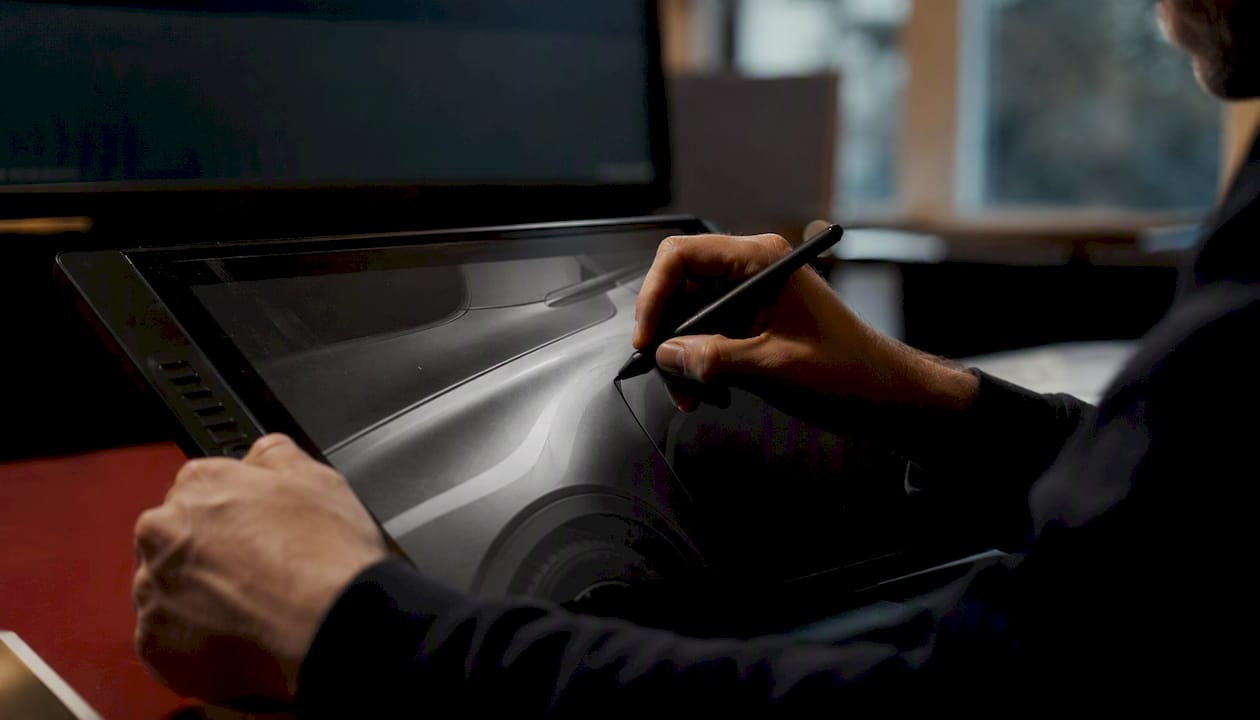
Healing and clone techniques remove or duplicate detail, most often used for dust spots, reflections of the photographer or crew, and small paint defects. The Healing Brush blends texture and tone automatically, while the Clone Stamp gives you exact pixel-for-pixel control, useful when a patterned surface (like a grille) needs precise duplication rather than a blended fix.
Pen tool masking creates the crisp, accurate selections that separate a vehicle from its background, essential for any composite work. Unlike a quick lasso selection, a pen path holds up under close inspection and lets you refine edges around mirrors, antennas, and wheel spokes with sub-pixel accuracy.
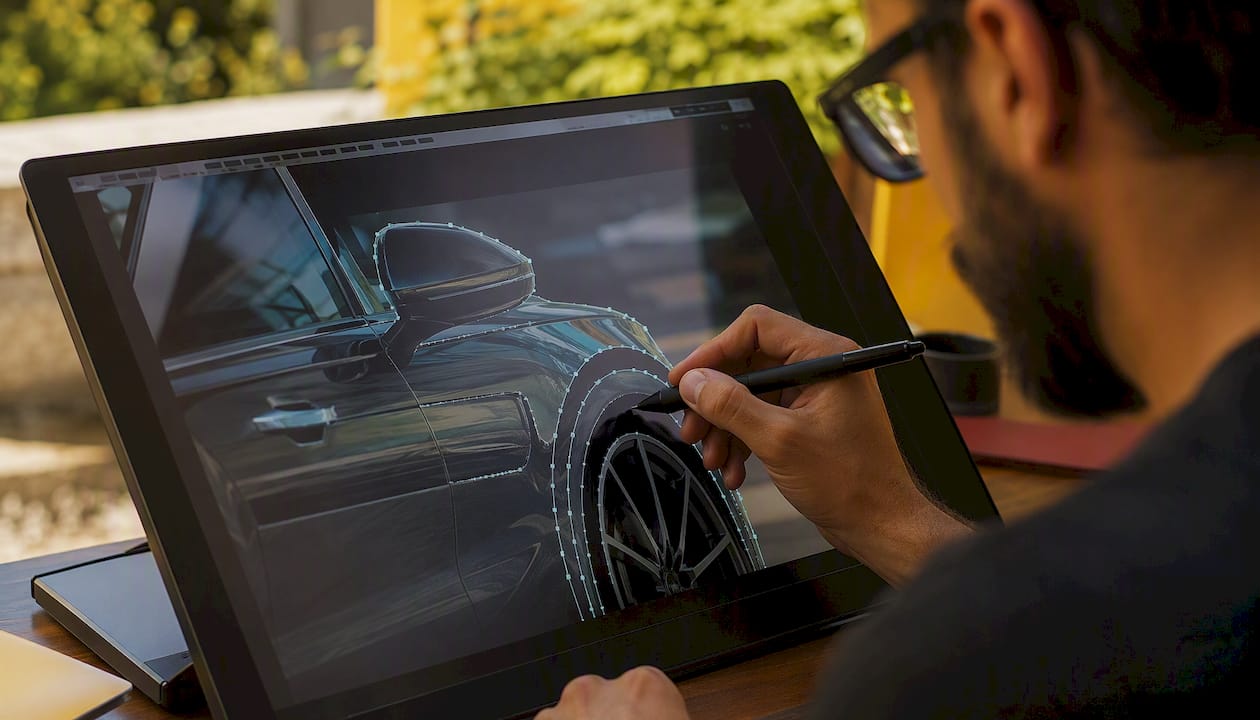
Liquify reshapes proportions or corrects lens distortion, but it's the technique with the least room for error. A slightly stretched wheel arch or an unnaturally straightened body line reads as fake to anyone who's looked at more than a handful of car photos. Use it sparingly and always compare against a reference angle of the same model.
The line between corrective and creative work matters here. Frequency separation and healing are almost always corrective, cleaning up what's already there. Liquify and advanced dodge and burn cross into creative territory the moment you're reshaping form rather than restoring it, and heavy background compositing is full scene creation rather than simple correction.
| Technique | Primary use | Corrective or creative |
|---|---|---|
| Frequency separation | Smoothing paint texture, removing dust | Corrective |
| Healing and clone | Removing spots, duplicating patterns | Corrective |
| Dodge and burn | Sculpting form and highlights | Both, depending on intensity |
| Pen tool masking | Isolating the vehicle for compositing | Corrective (enables creative work) |
| Liquify | Reshaping proportions, fixing distortion | Creative |
Which Software and Hardware Do Automotive Retouchers Use?
Adobe Photoshop remains the backbone of almost every professional automotive retouch, handling everything from frequency separation to complex compositing with layered, non-destructive control that no competing tool matches at the same depth. Adobe Lightroom complements it for batch color grading, RAW processing, and applying consistent looks across a full catalog shoot before individual files ever reach Photoshop.
Beyond the two Adobe staples, a few categories of plugins and helper tools show up regularly in professional pipelines:
- LUT managers for applying and adjusting consistent color looks across a batch of images.
- Sharpening tools built for output-specific sharpening rather than Photoshop's default filters.
- Noise-reduction plugins for high-ISO shots taken in dim studio or dealership lighting.
- Plug-in panel organizers that speed up repetitive masking and dodge-and-burn tasks across dozens of images.
Hardware matters more in automotive work than in most other retouching categories, mainly because you're often working with large RAW files and multiple high-resolution layers stacked for compositing. A hardware calibration device isn't optional if color accuracy is part of what you're selling.
Must-have: Adobe Photoshop, Adobe Lightroom, a calibrated monitor, and at least 16GB of RAM. Nice-to-have: A second reference monitor, a color-accurate tablet display, and specialty sharpening or noise-reduction plugins.
Pro Tip: Calibrate your monitor monthly with a hardware puck, not just an eyeball adjustment. A monitor that's drifted warm will make you undercorrect a car's actual color cast, and the client will catch it the moment they open the file on their own screen.
Why Metallic and Pearlescent Paint Are Hard to Retouch
Some paint finishes photograph differently depending on the angle you shoot from, and that's not a lighting mistake. It's a property of the pigment itself. Color flop describes how a metallic or pearlescent paint shifts hue or lightness as the viewing angle changes, because the metal flakes or pearl particles in the clear coat reflect light differently depending on where the camera and light source sit relative to the panel. Sparkle refers to the individual glint of those flakes catching light at certain angles, which is part of what makes a deep metallic blue look alive in person and flat in a poorly lit photo.
Digital color platforms like BASF's AUROOM® system let designers preview exactly how flop and sparkle behave on a 3D vehicle shape before physical paint samples even exist, which gives retouchers a useful digital reference alongside physical swatches. On set, pros capture multiple exposures at different angles, along with a physical swatch card in frame, so they have a ground truth to match against later rather than relying on memory or a single hero shot.
A practical color-management checklist for paint-critical work:
- Shoot a color reference swatch in every lighting setup, not just once per session.
- Capture at least two or three angles per panel on metallic or pearlescent vehicles.
- Work in a color space that supports CIE Lab conversions, since Lab and ΔE tolerances are the industry standard for describing how close a rendered color needs to be to the target before it reads as "off."
- Keep corrections product-correct. Toyota's own brand guidelines explicitly warn against saturation or warmth adjustments that push the paint beyond its actual color, even when the goal is a punchier, more energetic image.
Pro Tip: Photograph your reference swatch cards under the exact lighting setup you're shooting the car in, then archive them by shoot date and vehicle model. Six months later, when a client asks for a reshoot to match the original catalog, that swatch photo saves you from guessing.
Basic Cleanup vs Full Scene Creation: What's the Difference?
Not every retouch job needs the same level of intervention, and understanding the tiers helps you scope a project correctly before work starts. Professionals generally separate the work into cleanup versus scene creation, where cleanup fixes what's already in the frame and scene creation rebuilds part of the environment around the car.
- Basic cleanup: A single dealership photo gets dust removal, a light color correction pass, and reflection cleanup on the windshield. Nothing about the background or environment changes.
- Catalog prep: A batch of 50 vehicles gets a consistent color grade, background cleanup, and standardized cropping so the whole listing set reads as one cohesive catalog.
- Full scene creation: A car photographed in a parking lot gets composited into a studio environment or outdoor location, with reflections, shadows, and ambient light rebuilt from scratch to match the new setting.
| Service tier | What changes | Relative time/cost |
|---|---|---|
| Basic cleanup | Spots, minor color correction, reflection touch-up | Low, often per-image pricing |
| Catalog prep | Consistent grading and cropping across many images | Moderate, usually batch-priced |
| Full scene creation | Background swap, rebuilt reflections and lighting | High, project-based pricing |
A single hero image for an ad campaign, where the car is dropped into a new environment entirely, sits at the far end of that scale, both in skill required and in the hours it takes to make the composite hold up under scrutiny.
What Determines Automotive Retouching Cost?
Pricing swings widely because the drivers behind it aren't uniform across projects. The condition of the source image matters first. A clean studio capture needs far less work than a phone photo shot in a dim garage. Vehicle count matters too, since a single hero shot and a 200-image dealership catalog are fundamentally different jobs even if the per-image complexity is similar.
Complexity is the biggest swing factor. Compositing work, paint correction on metallic finishes, and multi-angle color matching all add hours that simple cleanup doesn't require. Resolution and intended output (a small web thumbnail versus a billboard print) change how much fine-detail work is worth doing. Turnaround time compresses or expands cost depending on whether a studio has to reprioritize other work to hit a rush deadline. Usage rights and licensing terms, especially for campaign or broadcast use, often carry a separate fee structure from the retouching labor itself.
Three pricing models show up most often:
- Per-image pricing works well for catalog and listing work where consistency and volume matter more than deep customization.
- Per-hour pricing suits complex, one-off composites where scope is hard to predict up front.
- Per-project pricing fits campaign work with a defined deliverable list and a fixed budget, giving both sides cost certainty.
Each model shifts risk differently. Per-image protects the buyer from scope creep but can undervalue genuinely difficult shots. Per-hour protects the retoucher's time but makes budgeting harder for the client. Per-project requires a clear scope document upfront but gives everyone predictability once that scope is locked.
Pro Tip: Ask every vendor for a written scope of work that names the number of images, revision rounds included, and file formats delivered. A vague quote of "$X per image" without those details is how projects balloon past budget.
When comparing quotes, weigh the total scope against the price, not just the headline number. A vendor charging more per image but including two rounds of revisions and full-resolution layered files may cost less overall than a cheaper quote that only covers a single flattened JPEG.
Where AI Helps and Where It Falls Short
AI-assisted tools have gotten genuinely useful for a specific set of automotive retouching tasks, and genuinely unreliable for others. Background removal, basic spot cleanup, and batch color harmonization across a large catalog are where automation earns its keep, cutting hours of repetitive work down to minutes.
Where AI tends to stumble is anywhere precision on paint color or reflection accuracy matters. Metallic and pearlescent finishes, in particular, confuse automated tools that weren't trained on angle-dependent color behavior, often flattening the sparkle or shifting the hue slightly off from the manufacturer's actual spec. Complex reflections on glass and chrome also trip up automated masking, frequently leaving haloed edges or smeared detail around mirrors and door handles.
A quick checklist for evaluating AI output before it ships:
- Zoom to 100% on every panel edge to check for masking artifacts around mirrors, wheels, and antennas.
- Compare the AI-corrected paint color against a physical or digital swatch reference, not just against the original photo.
- Check reflections for consistency with the actual light source direction in the scene.
- Flag any image with visible warping, smearing, or color banding for manual review before delivery.
The most efficient pattern combines both: let AI handle bulk background removal and first-pass color harmonization across a full shoot, then route anything flagged as paint-critical or composite-heavy to a human retoucher for final polish. This mirrors how multi-angle imaging paired with AI-assisted grading is already used in manufacturing color QA, catching slow drift earlier than manual spot checks alone ever could.
Pro Tip: When handing AI-processed files to a human retoucher, keep the original unprocessed RAW alongside the AI output. It gives the retoucher a fallback if the automated pass introduced an artifact that's easier to fix from scratch than to patch over.
What Files and Specs Should You Send to a Retoucher?
Miscommunication over file formats and color specs causes more rework than almost any other part of the process. A clear preflight checklist upfront saves both sides a round of frustrated emails.
Send the original RAW files alongside any retouched TIFF or PSD reference if one exists. Specify the color profile you need, whether that's sRGB for web use, AdobeRGB for broader-gamut digital display, ProPhoto RGB for maximum-fidelity archival work, or CMYK for print. State the exact pixel dimensions or print size required, and note any bleed or extra cropping space needed if the image is headed for a layout with text overlays.
| Deliverable | Typical format | Use case |
|---|---|---|
| Web-ready image | JPEG, sRGB | Listings, social media, email marketing |
| High-resolution master | 16-bit TIFF | Print, large-format display |
| Layered working file | PSD with organized layer groups | Future edits, brand asset library |
| Proof for approval | PDF with annotations | Client review before final delivery |
Standard practice includes clear file naming conventions (vehicle model, angle, and version number, at minimum) and a short metadata note on usage rights if the image is destined for paid advertising rather than an organic listing.
- Confirm whether you need a flattened file or a fully layered PSD for future edits.
- Specify resolution requirements before the shoot, not after, since upscaling a low-res source rarely produces a usable result.
- Ask whether the studio provides a proof PDF for sign-off before final files are delivered.
When Should You Hire a Professional Retoucher?
A few objective signals point clearly toward hiring rather than DIYing. High-volume catalog work, where consistency across dozens or hundreds of images matters more than any single shot, is one. Metallic or pearlescent finishes that need to match a brand color spec are another, since product-correct color requires a level of color management most casual editors haven't built. Any project involving compositing, background replacement, or campaign usage rights also tips toward professional work, given the legal and technical complexity involved.
When you're evaluating a vendor, a short list of questions separates the studios that know what they're doing from the ones that don't:
- What's your typical turnaround time, and do you offer a rush SLA if needed?
- Can you show sample before-and-afters from automotive work specifically, not general portfolio work?
- How do you handle color management, and can you describe your workflow for matching a manufacturer's paint spec?
- What's included in your revision policy, and how many rounds are standard?
- Do you deliver layered PSD files, or only flattened exports?
Watch for a few red flags in proposals and portfolios. A studio that can't show product-correct automotive examples, meaning color that actually matches the real vehicle rather than an artistically pushed version, is one warning sign. No clear articulation of a color management workflow is another. And any vendor unwilling to deliver layered files, insisting on flattened exports only, is limiting your ability to make future edits without paying for a full re-edit from scratch.
For marketers managing a brand's visual consistency across dozens of listings and campaigns, an automotive branding checklist is worth building into your vendor onboarding process from day one.
What a Professional Studio Workflow Actually Looks Like
A studio that's done this work for years follows a sequence that looks deceptively simple from the outside but protects against nearly every common failure point. It starts with a kickoff and art direction call, where the studio and client align on the intended look, the target channels, and any brand color standards that need to be honored. Capture preflight follows, checking lighting, angles, and reference swatches before the shoot wraps, since fixing a missed reference angle in post costs far more than catching it on set.
The retouch pipeline itself moves through cleanup, color correction, and any compositing work in defined passes, with client review checkpoints built in rather than a single all-or-nothing delivery. Color sign-off is its own distinct step for paint-critical projects, often requiring a side-by-side comparison against a physical swatch or a digital reference file. Final delivery includes the agreed file formats, color profiles, and any usage documentation the client needs for their own records.
A few trust signals separate a studio worth hiring from one that isn't. Documented use of color profiles and a described ΔE tolerance approach signals real color management competency rather than eyeballed corrections. Portfolio breadth across automotive and mobility sectors, not just a handful of cherry-picked images, shows range. A clearly stated revision policy avoids the ambiguity that turns a simple project into a drawn-out back-and-forth.
Precision in color work isn't about perfection for its own sake. It's about the vehicle in the photo matching the vehicle a customer will see parked in their driveway. Every step in a professional pipeline exists to protect that match.
[author_bio]
[brand_signal]
Speed vs Precision: An Editorial Take on Production Trade-offs
The conventional wisdom in this industry treats every image like it needs the same level of polish, and that's where a lot of budgets and timelines get wasted. A social media post that disappears from a feed in 48 hours does not need the same color-critical treatment as a print ad running in a national campaign. Treating them identically either overspends on the throwaway image or, more often, underspends on the one that actually needed the rigor.
The smarter approach tiers quality deliberately by channel. A quick triage rule works well here: ask what the image's shelf life is and how closely a viewer will scrutinize it before deciding how much retouching time it deserves.
- Social media: Basic cleanup and color correction are usually enough; speed matters more than pixel-perfect paint accuracy.
- Web listings: Consistent catalog-level color grading matters most, since buyers compare multiple listings side by side.
- Print and campaign work: This is where color-critical, Lab-aware correction and full compositing earn their cost, since the image represents the brand at full scrutiny and scale.
Where this gets nuanced is that AI tools and fast manual passes are perfectly adequate for the first tier and increasingly capable in the second. It's only at the top tier, print and campaign work where a client's brand color standard is on the line, that human judgment on reflections, sparkle, and angle-dependent paint still wins. That's not a knock on automation. It's a recognition that the tolerance for error shrinks as the image's audience and lifespan grow.
A Faster Path to Product-Correct Automotive Images
If you've read this far, you already know that automotive retouching gets complicated fast once metallic paint, compositing, or catalog-scale consistency enter the picture. That's the exact gap 35milimetre fills for ad agencies, automotive brands, and professional photographers who need studio-grade results without building an in-house color pipeline from scratch.
35milimetre works as an extension of your team, not a black box vendor. A typical engagement starts with a kickoff to align on brand color standards and the target channels for the imagery, followed by sample work so you can evaluate quality before committing to a full batch. From there, turnaround expectations and revision rounds get scoped clearly upfront, so there are no surprises when the files land in your inbox. The studio's two decades of experience in compositing, color grading, and CGI across automotive and technology sectors means metallic paint and full scene creation are standard territory, not a stretch assignment.
If your next shoot needs product-correct color, consistent catalog output, or a full composite, start a project with 35milimetre and get a sample turnaround before you commit to the full batch.
Sources
A handful of resources go deeper into the technical and creative sides of this work if you want to build real expertise rather than just get through your next shoot.