
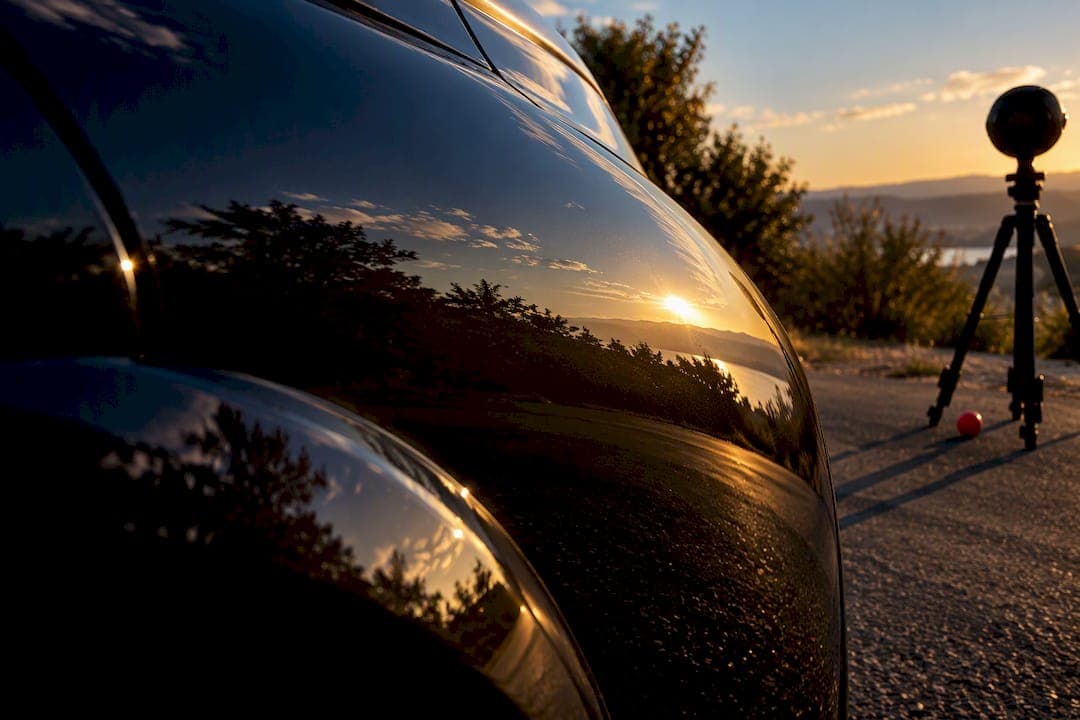
For photorealistic car renders, pair a matched high-resolution EXR HDRI with a RAW or DNG backplate whenever the budget allows, and render in a scene-linear ACES workflow. When a matched set isn't available, buy the highest-resolution spherical EXR you can afford and shoot or source a separate RAW backplate. Before checkout, confirm the license, resolution, and any sIBL metadata included in the package, then align the sun vector to your plate and add supplemental lights to finish the shot.
TL;DR:
- Using a matched high-resolution EXR HDRI with a RAW or DNG backplate grants the most photorealistic automotive renders, especially when shot at the same location and time.
- HDRMAPS’ Road D42 bundle offers a compressed set of 20 location-based backplates paired with a spherical HDRI, streamlining the matching process.
- OpenEXR files at 8K resolution are suitable for most mid-distance shots, but close-up hero shots benefit from 12K to 20K HDRIs to avoid sampling artifacts.
- Proper HDRI-to-backplate matching involves camera alignment, perspective correction, sun vector adjustment, and linear-space exposure and white balance.
- Relying solely on environment maps to produce highlights on wheels or paint is insufficient; targeted supplemental lights improve detail and reflection control.
Table of Contents
- Where to Find High-Quality Automotive HDRIs and Backplates
- What File Formats and Color Workflows Work Best for Automotive Renders?
- How Do You Match an HDRI to a Photographic Backplate?
- Pro Tips for Realistic Automotive Lighting and Reflections
- Licensing and Delivery: What to Check Before You Buy
- 35milimetre's Checklist for HDRI and Backplate Production
- Stock Assets or a Commissioned Shoot: How Do You Decide?
- How 35milimetre Handles HDRI-Aware CGI and Compositing
- Where to Learn More
- When Stock Isn't Enough: The Perspective Nobody States Plainly
- Sources
- FAQ
Where to Find High-Quality Automotive HDRIs and Backplates
Specialist vendors remain the most reliable route for automotive work because they sell HDRI and backplate as a single matched unit, shot at the same location, same time of day. That pairing means the reflections in your CGI car actually agree with the shadows on the ground plane. HDRMAPS' Road D42 bundle, for instance, ships a spherical HDRI alongside 20 backplates captured on location, which saves you from hunting for a plate that happens to match your lighting rig.
Beyond dedicated automotive vendors, you'll find broader marketplaces selling single-location packs and volume bundles aimed at product visualization studios, along with Gumroad-style independent sellers who specialize in niche environments like showroom interiors or desert highways.
For quick lookdev before a purchase decision, free repositories like OpenHDRI let you test lighting direction and reflection behavior without spending a cent, though the resolution and backplate matching rarely hold up for final delivery.
When evaluating any product page, check for:
- Stated HDRI resolution and bit depth (8K minimum for serious work)
- File formats offered (EXR is non-negotiable for final renders)
- Whether backplates are RAW/DNG or already baked into JPEG
- sIBL metadata or camera capture data bundled with the download
- A preview render showing the HDRI and backplate together, not separately
What File Formats and Color Workflows Work Best for Automotive Renders?
OpenEXR is the professional standard for HDRI storage, and there's a concrete technical reason why: it holds 32-bit float data across multiple channels, which means highlight information on chrome and glossy paint doesn't clip the way it does in an 8-bit JPEG. The OpenEXR specification was built for exactly this kind of high-dynamic-range, multi-channel compositing work, and it's why every serious HDRI vendor delivers in .exr rather than .hdr as the primary format.
.hdr files and tonemapped LDR previews still have a place. Use them for fast iteration when you're testing composition or camera angles and don't need physically accurate lighting yet. Switch to the full EXR the moment you start judging reflections or grading the final frame.
Pro Tip: Keep an 8K EXR on hand for early lookdev passes, then swap in the 12K to 20K version only for your final beauty render. Working in the massive file the whole time just slows your iteration speed for no visual benefit until the last mile.
For resolution, 8K is usually enough for early lookdev and mid-distance shots. Reserve 12K to 20K spherical HDRIs for close-up hero shots where curved chrome and paint panels reveal every sampling artifact a lower-resolution map would introduce. Run the whole pipeline through an ACES or scene-linear Rec.709 workflow with OpenColorIO so your lighting behaves physically correct from render through to the display transform.
How Do You Match an HDRI to a Photographic Backplate?
Getting the composite believable comes down to sequence. Skip a step and you'll spend hours fighting reflections that never quite sit right.
- Import the backplate and set focal length. Match your virtual camera's focal length and sensor size to the metadata from the original photograph, then correct for lens distortion if the plate was shot on a wide angle.
- Align perspective to the plate. Position the car and camera so scale, horizon line, and vanishing points agree with the backplate's geometry.
- Rotate the HDRI to match the sun direction. Look at the shadow angle in your backplate and rotate the HDRI (or adjust the sun vector directly) until your CGI shadows fall the same way.
- Set exposure and white balance in linear space. Adjust the 3D scene, not the plate. Forcing the photograph to match your render throws away the color information you need for a clean grade later.
- Add supplemental lights and dial in occlusion intensity. A pure IBL setup rarely produces the crisp contact shadow a viewer expects under a wheel arch, so boost ambient occlusion strength and bring in a targeted light where needed.
That exposure step trips up more artists than any other part of the pipeline. The instinct is to color-correct the photo until it "feels right" against the render, but that destroys the plate's original white balance and exposure data, information you'll want later for grading. Autodesk's visualization walkthrough documents this exact camera match, HDRI align, and shadow tuning sequence used in production pipelines, and it holds up regardless of which renderer you're running.
Pro Tips for Realistic Automotive Lighting and Reflections
An HDRI alone almost never produces the crisp highlight a wheel needs. The environment map gives you broad, believable ambient light, but it lacks the punch of a controlled studio strobe hitting a rim or a brake caliper. Add disk or area lights specifically for those details rather than cranking IBL intensity to compensate.
Reflections on curved automotive paint tend to pick up everything in the environment, including objects you never wanted visible. Build simple reflection-control geometry, cards, or planes placed just outside camera view, or dial back roughness selectively on panels where the clutter is worst.
- Place disk lights at wheel arches and panel edges for controlled specular pop.
- Build reflection-control cards to clean up busy or distracting environment reflections.
- Grade only after compositing, and only in linear or ACES space, never on the raw plate.
- Mask the backplate separately from the CGI car so you can tweak sky or ground tones without touching the vehicle's paint.
Pro Tip: Render your car and its shadow pass separately from the backplate. It gives you the freedom to grade the environment independently without ever touching the vehicle's paint values, which is where clients notice the smallest shift first.
Save the display transform for the very end. Studios working across HDR delivery formats for both broadcast and cinema screens treat that final transform as a distinct step from grading, not something baked in earlier in the pipeline.
Licensing and Delivery: What to Check Before You Buy
Royalty-free is the standard license type for most HDRI and backplate packs, but "royalty-free" doesn't automatically mean "cleared for any commercial use." Read the fine print on rights-managed clauses before you put an asset in front of a client, especially for agency work where the final imagery runs across paid media.
A typical package from a specialist vendor, like HDRMAPS' Auto Viz bundle, includes the EXR or HDR file itself, a tonemapped JPEG or PNG for quick preview, RAW or DNG backplates, and often sIBL metadata that tells your renderer exactly how the map was captured.
Before you commit to a purchase:
- Request multi-resolution sets so you're not stuck re-downloading a 20K file for a quick lookdev pass.
- Check the EXIF or camera data bundled with the backplate to confirm focal length and sensor size for accurate matching.
- Keep a local asset catalog with resolution, license terms, and capture metadata logged for every purchase, project audits move a lot faster this way.
35milimetre's Checklist for HDRI and Backplate Production
Running a lean automotive pipeline comes down to discipline at the asset stage, because a bad HDRI choice costs you hours later in compositing. Before any asset enters a project, we check resolution against the shot's demands, confirm the EXR carries clean multi-channel data, note the capture time and sun angle against what the brief calls for, and verify whether RAW backplates are included or need sourcing separately.
Once assets clear that bar, the pipeline runs camera match, scene-linear render in ACES, HDRI-driven ambient light, targeted supplemental lights, separated render passes, then compositing and grade. Studio-proven examples of this sequence in action show up in real automotive campaign work.

Outsourcing makes sense on brand campaigns with tight turnarounds, or any project demanding a precise on-location capture that stock libraries simply don't have in their catalog.
Stock Assets or a Commissioned Shoot: How Do You Decide?
Stock wins on speed and cost when you need numerous color and trim variations rendered fast. Commission a custom HDRI and backplate shoot when composition, reflection control, or location rights are non-negotiable for the brief. A hybrid approach, buying a strong stock HDRI and commissioning one retouched backplate for the hero angle, often gets you both budget control and photographic precision.
How 35milimetre Handles HDRI-Aware CGI and Compositing
Sourcing the right HDRI and backplate is only half the job. Getting the reflections, contact shadows, and final grade to hold up under client scrutiny is where most in-house pipelines lose time they don't have. 35milimetre works as a direct extension of your team on exactly that stage, handling HDRI-aware CGI, photographic compositing, and retouching, then carrying the image through to final grade so nothing gets lost in handoffs between departments.
High-stakes campaigns and single-vendor deliverables are where a dedicated studio earns its keep, particularly when a brand needs one consistent visual voice across dozens of trim and color variants. Our compositing and retouching services cover exactly this kind of automotive finishing work, and 3D render pricing starts at $80 to $175 per image depending on complexity. If your team needs high volume without sacrificing consistency across variants, our AI product compositing service handles rapid trim and color variations from a single master setup. Reach out to scope your next automotive project and get a quote based on your actual shot list.
Where to Learn More
For deeper technical grounding, read the Blender color management docs and the OpenEXR specification. For workflow context on combining CGI with photographic plates, see 35milimetre's automotive CGI breakdown and the automotive visualization primer.
When Stock Isn't Enough: The Perspective Nobody States Plainly
Most guides to automotive HDRIs treat asset selection as a shopping problem: find the highest resolution, check the license, download, done. That framing undersells how much of the final image quality actually comes from decisions made after the download, not before it.
Here's what gets underestimated: an 8K HDRI matched carefully to a backplate's sun angle and graded properly will beat a 20K HDRI dropped into a scene with no supplemental lighting and no exposure discipline, every time. Resolution matters most for close-up chrome and curved paint, but it's the least forgiving variable if you get the color workflow wrong. A scene rendered outside scene-linear space, then pushed through a tonemapped display transform as an afterthought, will look flat no matter how expensive the HDRI was.

The other overlooked point is that free and paid assets solve different problems, not different tiers of the same problem. Free repositories are genuinely useful for lookdev, they're not a lesser version of a paid pack you should "graduate" from once budget allows. They serve iteration speed. Paid matched bundles solve for accuracy and finish. Treating one as a cheaper substitute for the other leads teams to either overspend on assets they don't need yet, or underspend on the final hero shot where matched backplates actually earn their price.
The honest bottleneck in most automotive pipelines isn't asset quality anymore, HDRI vendors have gotten very good. It's the discipline to run the color pipeline correctly from import to final grade, and the patience to add the two or three supplemental lights that separate a convincing render from a merely accurate one.
— 35mm
Sources
- Blender manual — color management
- OpenEXR documentation
- Road D42 • Automotive HDRI and 20 backplates • HDRMAPS
FAQ
What Resolution HDRI Do I Need for Automotive Renders?
An 8K spherical EXR handles most lookdev and mid-distance work without visible sampling artifacts. Reserve 12K to 20K resolutions for hero close-ups on chrome and curved paint, where lower resolution maps produce visible banding in reflections.
Should I Use .hdr or .exr Files for Automotive Lighting?
OpenEXR is the industry standard for final production work because it stores 32-bit float, multi-channel data that preserves highlight detail. Use .hdr or tonemapped previews only for fast iteration during early composition and camera tests, per the OpenEXR specification.
How Do I Align an HDRI's Lighting to My Backplate's Shadows?
Rotate the HDRI, or adjust its sun vector directly, until the shadow direction in your CGI scene matches the shadow angle visible in the photographic backplate. Set exposure and white balance afterward in linear space rather than adjusting the plate itself.
Are Free HDRI Libraries Good Enough for Client Work?
Free libraries like OpenHDRI work well for testing lighting direction and early lookdev, but they rarely include the matched backplates or sIBL metadata that paid automotive-specific bundles provide. Reserve free assets for iteration, not final delivery.
How Much Does Automotive Compositing Cost With 35milimetre?
3D render pricing runs $80 to $175 per image depending on complexity, while compositing and retouching pricing is available on request through the studio's service page.